Secure Boot is one of many features available for computers that use UEFI over BIOS. It essentially protects the computer system and the OS installed by blocking any malicious software from running during the boot. Knowing how to enable or disable secure boot in Windows 11 or 10, will help you install multiple windows or work around your current hardware issues like me.
I have personally run into issues multiple times because of this particular feature. I have multiple PCs, and I sometimes use a remote desktop to log in to them. If I try to use the Wakeover LAN feature and there is any device connected to it, Secure boot prevents it from booting (which is why secure boot is so useful in the first place).
NOTE: The Secure Boot Is not an operating-system-specific feature. It’s a part of the UEFI, which is a tiny piece of software that helps you to start your PC, get the firmware up and running, load Windows files onto the respective disks, etc.
Learn more about UEFI on Windowsclub.com
If you have found yourself in a similar situation, this guide is a step-by-step guide to disabling the UEFI Secure Boot feature in Windows 11 machines. Some manufacturers allow you to update your BIOS version that might enable these features too.
I cannot stress enough that making these kinds of alterations to your system configurations without the background knowledge of why you are doing it might put you into more trouble.
For anyone that is not sure why this is done or if they should even turn off Secure Boot on their windows 11 or Windows 10 system, please reach out to me with the issue you are trying to solve in the comments section below.
1. Dangers of Disabling Secure Boot In Windows 11 or Windows 10
Microsoft supports and encourages its users to enable the Secure Boot option in their Windows operating system if their hardware is capable of it.
As mentioned earlier, this is not a Windows-specific feature but a feature decided by the hardware manufacturers. I would say if you have a laptop or desktop that you bought recently your system should support both BIOS and UEFI – Secure Boot being a feature of UEFI.
At its core, the main purpose of Secure Boot is to protect your system from any boot-level malware or any hardware that might be harmful to your PC.
So one of the dangers of disabling secure boot is that your PC will be vulnerable to these boot sector level malware and any hardware devices that might hurt your operating system while booting up.
If you disable your antivirus, your computer will run without any issue, correct? Until your systems get infected with Computer viruses and malware. You can compare disabling secure boot to disabling firewall, disabling windows defender or the antivirus system on your Windows 11 or Windows 10 PC.
I hope, this helps you make a better decision regarding the dangers of disabling the secure boot option.
All this said, sometimes you cannot boot from a USB drive without disabling Secure Boot on your Windows system.
2. How To Enable or Disable Secure Boot In Windows 11 or Windows 10
If you know what you are doing and absolutely need to disable secure boot, follow the steps mentioned below. And if you are actually trying to enable secure boot on your Windows 11 or Windows 10 system, follow the same steps but instead of disabling it, you should be enabling it.
2.1 How to Check if Secure Boot Is Enabled In Your System?
Checking to see if your desktop or laptop has UEFI or the secure boot installed is very simple from within Windows 11 or 10.
Regardless of which version of the windows operating system you use, the same process applies to both.
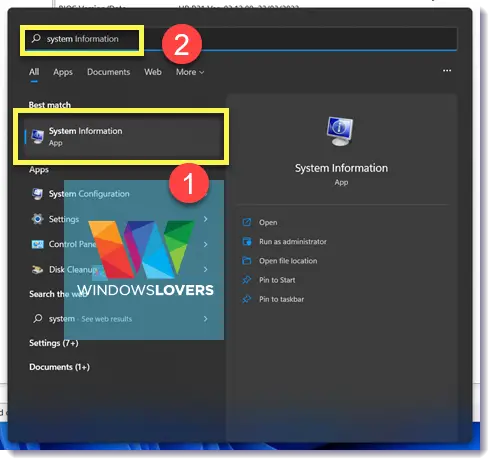
Go to Start and type “system information”. You can also press the Windows key on your keyboard and use the search feature.
Open the System Information app. Use the below image for reference.
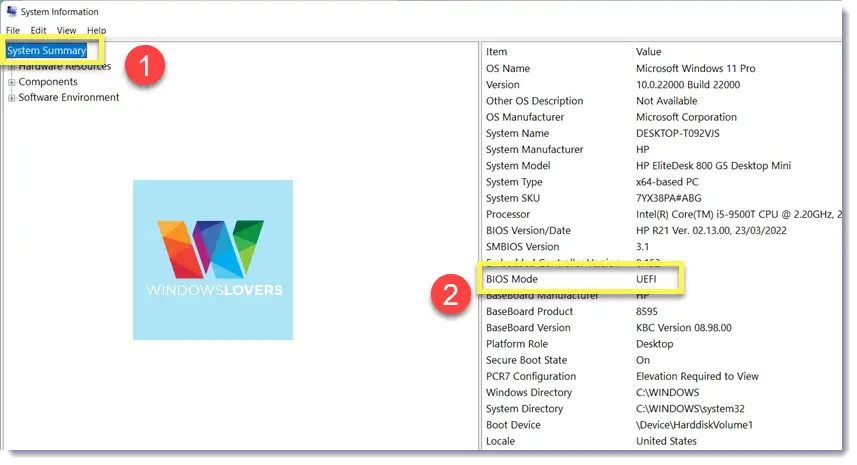
Make sure you are under “System Summary” and look for “Secure Boot State”.
If your computer supports Secure boot, the option will indicate if it is turned “ON” or “OFF”.
2.2 How to Disable Secure Boot In Windows 11 or Windows 10
If you cannot log into the Windows system at all for some reason, what essentially we are doing first is booting into the BIOS settings of the PC.
Since the process to get into the BIOS menu differs depending upon the hardware you have eg. ACER, HP, DELL, Lenovo etc, so you will have to do some digging on how to get into BIOS for your computer.
In some cases, updating or upgrading the UEFI BIOS firmware does help you solve page fault in nonpaged area on boot error as well.
If you can get into windows, please follow the steps below.
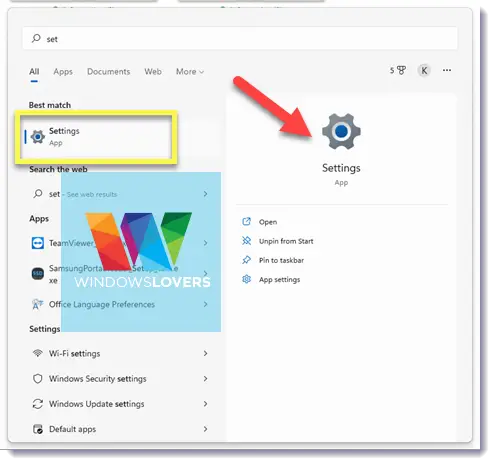
Go to “Start” and open the “Settings”. This applies to both Windows 11 and Windows 10 machines.
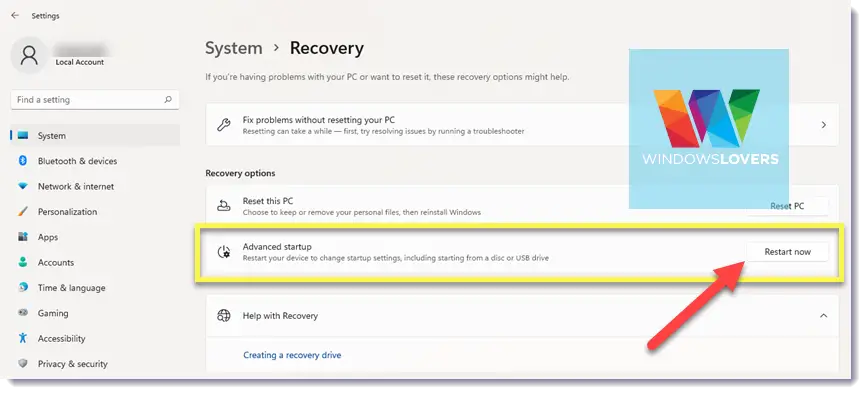
Under “System, find and open “Recovery”.
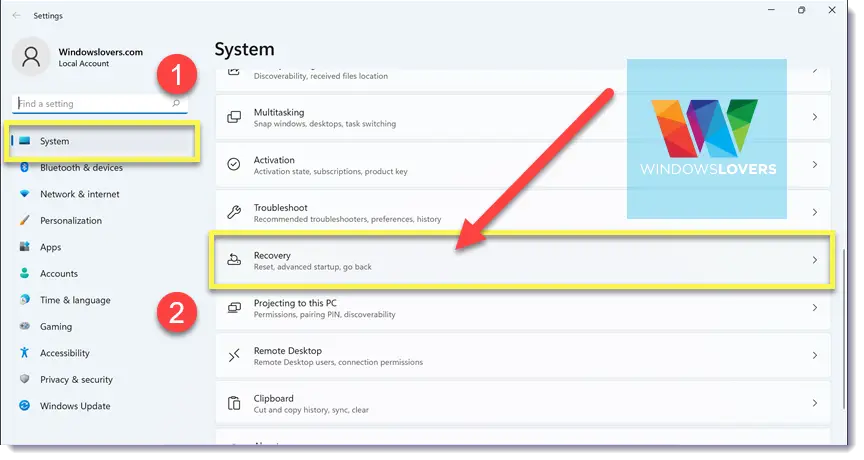
From the next page, under “Recovery options” find “Advanced startup”.
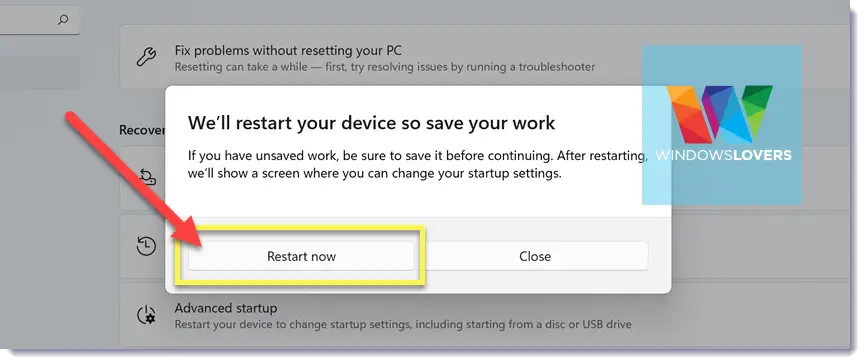
Click on “Restart now”. The next dialog box that pops up will warn you that any unsaved work will be lost and you should save everything that is not saved.
When you are confident, click on “Restart now”.
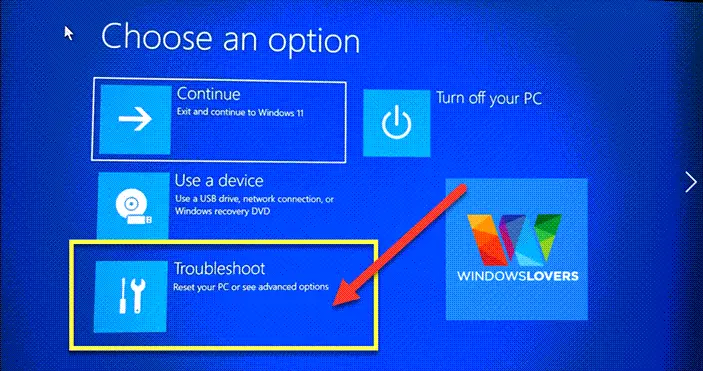
Your computer will now restart into advanced mode, it’s just the blue screen as you can see in the screenshot below. If you are taken to the normal windows login screen, please follow the steps again.
Alternatively, hold the “SHIFT” key on your keyboard and restart the computer from the login screen. This is a shortcut to boot into recovery mode or the advanced boot options.
Click on “Troubleshoot” > “Advanced options”.
On the next page, find and click on “UEFI Firmware Settings” and restart.
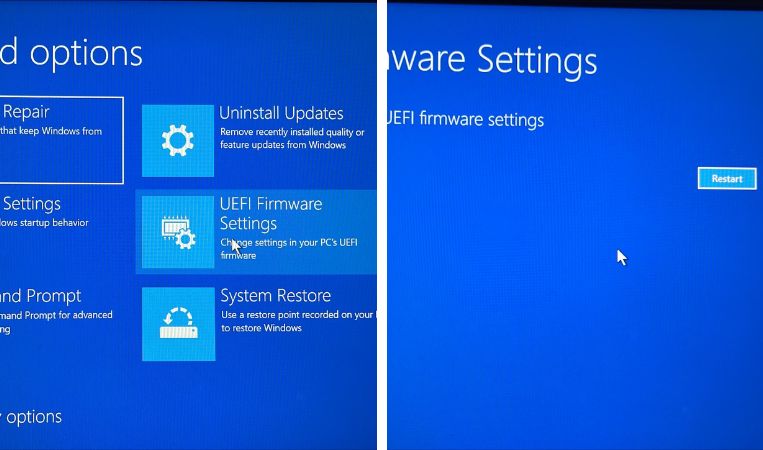
Your computer should now boot into the BIOS settings page, the settings page again will differ according to the hardware manufacturer or OEM.
A general rule of thumb is to look for something along the lines of “Boot”, “Boot Security”, “UEFI Settings” e.t.c. As you can see in the screenshot below, mine is under the “Boot” options on the BIOS page.
I use the keyboard to move the selection to “Secure Boot:”, hit enter, and finally select “Disabled”.
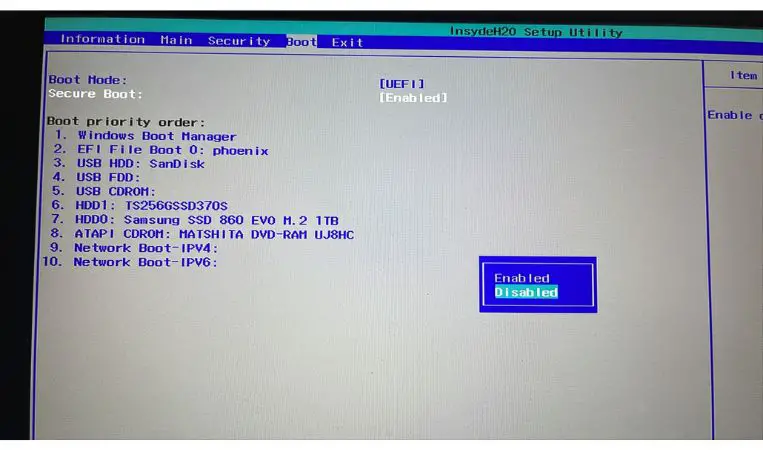
Some BIOS have the option to exit with/without saving the changes you just made. Double-check if you have to save the change you made otherwise the secure boot feature will not be enabled.
That’s how one can enable or disable Secure Boot on Windows 11 or Windows 10 machines to dual boot Linux or install some other unsupported hardware.