YouTube can be a lot of help sometimes. There are a lot of tutorials on YouTube that are merely screencasts, showing how to solve a specific issue. Today in this article I am going to guide you through the process of how to record screen for YouTube.
I’ve received lots of requests before on how to record a computer screen on my YouTube channel as well, so this article is aimed to guide you through my process of recording a screencast video for my Youtube channel.
Before we get into the tutorial, I want to get some of the things clear. If you are going to record a screen for YouTube, or want to record your computer screen for presentations, assignments you should keep these things in mind.
If you want to record excellent quality screencasts, your computer should have a decent processing capacity. The main reason is that the CPU requires a lot of power to capture and render the screen. But this complies only if you are going to record it offline.
There are a bunch of different ways you can record your computer screen. I use offline software(I’ll talk about that later in the post), but you can also do it online. Each method has its pros and cons which we will get into later.
How To Record Screen For YouTube on Windows or MAC OS
To save you some scrolling time, I am going to summarize what I am going to write about quickly.
- Recording Your Screen Offline(Using An Application)
- Record Your Screen Online(From An Online Tool)
How To Screen Record YouTube Videos With Audio
I am guessing since you are going to record your screen for YouTube. You must either make video tutorials or gameplay. You might be using it for something else too, which is fine. So I am just going to cut the chase and mention the only software that will be able to do the job for you. For me, it’s the best screen recorder for youtube I’ve used.
Bandicam: Bandicam has been one of the best screen recording applications that I have ever used to make YouTube Tutorial videos. Its user interface is straightforward, and it takes your gameplay recording to a whole new level. Bandicam is the best in the business, trust me.
Some of the best features about Bandicam that I absolutely love are:
- Simple and easy to use interface.
- Recording Screen With GPU support
- Good control over the output/input configurations
- Webcam Support
- And Bunch of other cool features
How To Use Bandicam To Record Screen For YouTube?
First, you need to download a free trial or purchase a full license for Bandicam(I highly recommend this).
Note: The free version of Bandicam has a watermark on the video. If you want to remove the watermark from the screencast videos, you will have to purchase the software. I use the premium version that costs around $30 and is worth the investment if you are looking to create professional screencast videos without any watermark.
Let me break down all the steps.
- Go to the website and download Bandicam.
- Install Bandicam as you would install any other windows application. Start the app from the desktop or start screen.
Bandicam Settings For YouTube I Use
Now let’s look at some of the basic configurations you should look into first.
- After you launch Bandicam for the very first time, it checks if your system is equipped with a graphics card.
- If it gives you a pop-up message like you can see in the screenshot below, just hit yes. This is just getting the graphics card to work inside Bandicam.
- GPU CHECK
- Welcome to Bandicam’s User interface.
I want to go through some of the most important settings that you seriously look into to record screen for YouTube.
General
The General tab is for most of your general configurations for the video.
- Select the “Output Folder” for the video of the screencast to be stored.

Video
Another essential tab is the Video tab. Here you will configure all of your video output settings like file format, quality, and other useful settings. I recommend the following configurations.
- Under record, set the “Hotkey”/ Shortcut key to pause or stop the video. This makes recording a lot easier. To change this, click on the blanks “f12 or “shift+F12”.
- Click on settings, and you should see a window as shown.
- If you are also recording audio for the video, tick the “Record Sound” option and select the Primary and Secondary Sound device. But I strongly recommend that you use “Audacity” to do all the recordings for YouTube to get better quality.
- You should see other options such as Webcam, Logo, Effects, and Options.
- Under the options tab, set Recording priority to at least [High].
Time for file format settings.
Under the Format tab, you should see another setting button. Click on that, and you should see the other configurations window.
- Select File Type to MP4.
- Under the code, select your graphics card if you have one.
- FPS, the more, the better. By default, it is set to 30, which also is good to record screen for YouTube.
- Quality higher the better, but depends on the capability of your system.
Finally, its time to start recording your screen.
After you finish configuring all the settings, to the start recording you need to press the big red “RED” button, you can also use the “Hot Key” that you set up earlier.
Bandicam Rec Settings
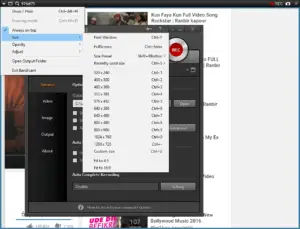
But before that, you need to be on the proper profile to record screen for YouTube. There are three choices out of which you will be mostly using only one. That will be the “Screen Recording Mode.”
- Click on the “Screen Recording Mode,” and it should open a window.
- On the top left corner, press the down arrow button that should pull down a new window.
- From the window, select the screen size, opacity.
- Finally, press the Rec button to record the screen for YouTube.
Handy Bandicam Tips
I personally use Bandicam to record my screen and create screencast tutorials. I try to make sure my videos are of high quality so that anyone watching my video to get something done, can easily navigate through the tutorial I have on my channel.
That’s the reason I try to maintain 60fps settings on all my videos. And if you have edited videos before, you should know that If your original video is not in 60 FPS, you will have to wait a longer period to render your video in 60 FPS.
Even though I had correct settings on Bandicam, I was getting a variable FPS on my video.
I fixed it by doing the following:
- Open bandicam, click on settings under “Format”
- A small window pops up, under FPS enter your required FPS
- Click on the button next to “Codec”
- In the next window, make sure “CBR – bitrate-based” option is selected. (Mine was set to VBR)
- Make sure under “GPU Usage” you have your graphics card selected instead of “Auto select”
- Click on OK
- Restart Bandicam and you should get a fixed FPS on any video you create with Bandicam

Free Online Screen Recorder For YouTube
1. Screencast-o-matic
Online free screen recording tool that I use sometimes is screencast-o-matic.
- Just head over to their website and click on start recording.
- This will download a small tool and in a minute, should open the interface for recording your screen.
2. Apowersoft
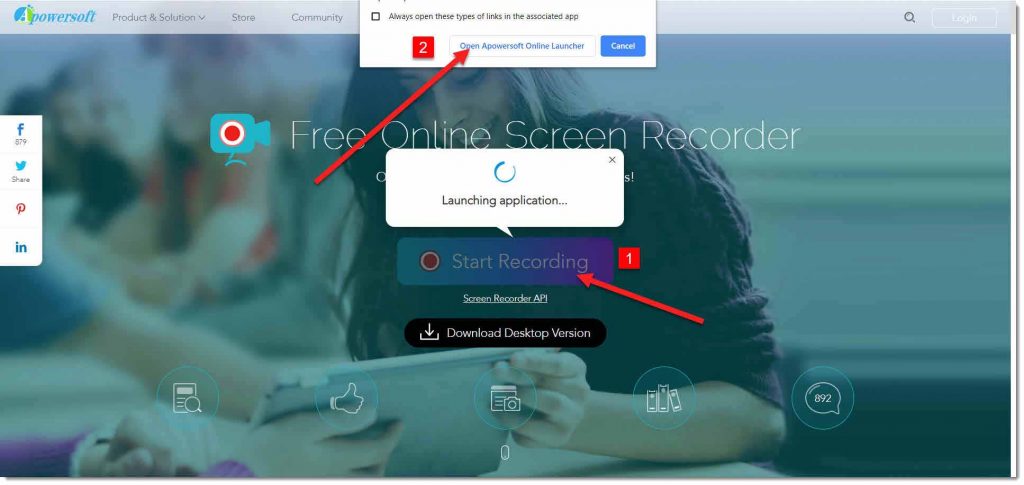
Another tool I’ve found useful is Apowersoft. Like Screencast, you will have to download their free tool and install it. Let me give you a quick rundown on how to record video using apowersoft online.
- Go to www.apowersoft.com/free-online-screen-recorder
- Download their free, lightweight tool.
- Install the apowersoft screen recorder tool.
- Restart your browser(we prefer google chrome).
- Go to www.apowersoft.com/free-online-screen-recorder again.
- Click on Start recording.
- Allow the website to run apowersoft recorder and start recording your screen.
Finally,
To record screen for YouTube on windows and mac os has never been this easy.
I’ve been recording screen for youtube videos for a while now, and I’ve tried lots of free/paid recording software, including Camtasia, bb flash recorder e.t.c.
Bandicam has been my personal favorite when it comes to recording screens for YouTube. But for sure Bandicam hits all the notes when it comes to the free video recording apps for YouTube.
Was this article useful?? Show us some love by sharing this on social media websites.
Let us know in the comments below.