Upgrading your Windows 10 machine to Windows 11 machine is quite simple as compared to earlier versions. Take the upgrade from Windows 7 to Windows 10 for instance, it was a nightmare for many users. Microsoft had to eventually end the service for Windows 7 to make sure everyone moved to Windows 10.
The move toward Windows 10 was welcomed by most users as it brought new features and opened a whole new possibility for its users.
Windows 11 takes it a step further, and if you have a machine that is running Windows 10 and if your Laptop or desktop is capable of the upgrade, the process to upgrade to Windows 11 is quite streamlined.
In case, you are confident your PC is capable of operating Windows 11 smoothly but is not allowed for the upgrade because of the TPM error, you can bypass this pc can’t run Windows 11 message.
This article assumes that Microsoft wants you to upgrade your PC to Windows 11 and that you understand the issues your desktop/laptop might run into after the upgrade.
The good news is that you can always downgrade back to Windows 11 within 10 days of the upgrade if you would like to wait longer before fully transitioning.
Free Upgrade From Windows 10 To Windows 11 Without Losing Data
All the users with eligible Windows 10 devices should have been notified by now and given an option to upgrade to Windows 11.
If you are not sure about this or missed the prompt, do the following:
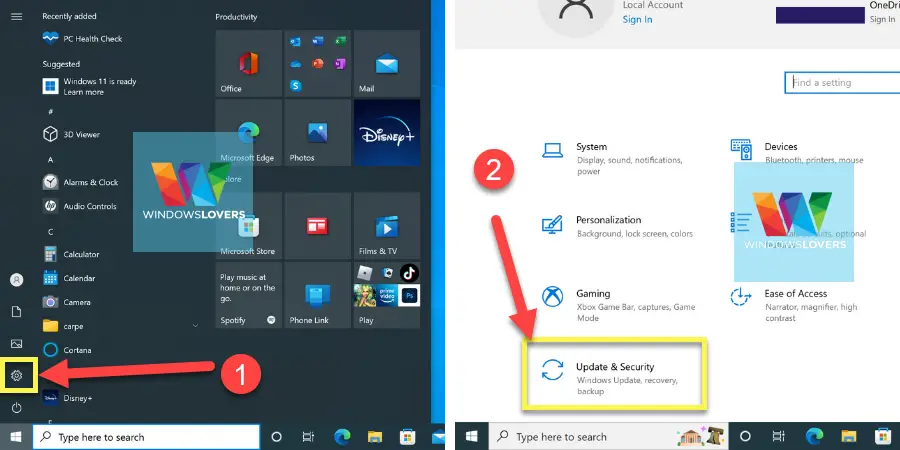
Go to “Settings” > “Update & Security”.
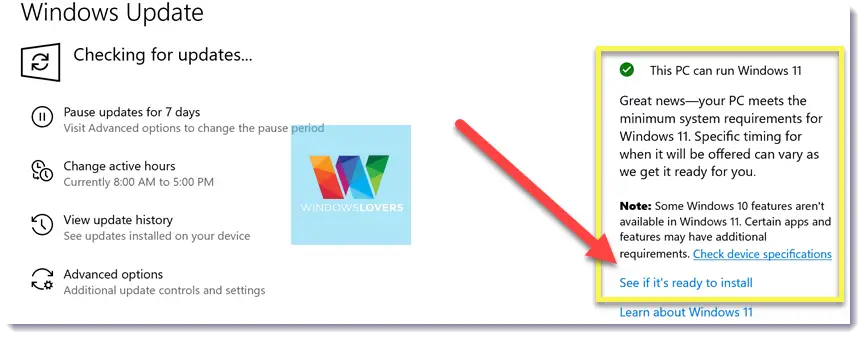
Most users should see a “Windows 11 is ready — and it’s free!” message on the top of the Windows Update screen as you see in the screenshot below.

For someone who clicked on the “Stay on Windows 10 for now” option, this prompt is removed. If you look at the right-hand side of the windows update section, you should find a “See if it’s ready to install” link. Click on that link and wait a few seconds.
Click on the “Download and install” button which initiates the Windows 11 upgrade process.
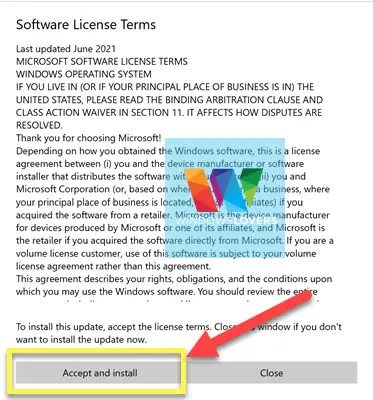
Agree to the terms and conditions by clicking on the “Accept and install” button.
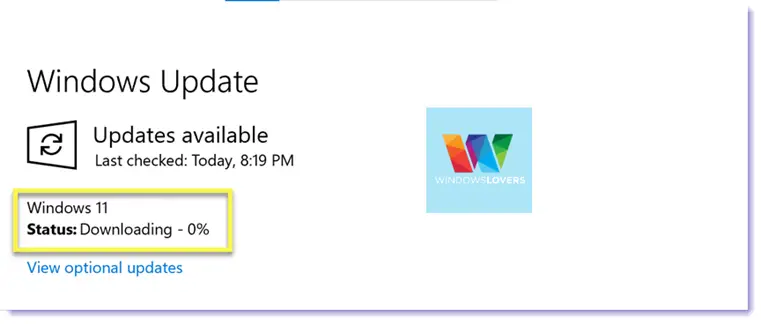
Windows update tool will now start downloading all the necessary files to install and upgrade your computer to Windows 11. Depending upon your internet connection, this can take some time.
After all the Windows 11 installation files have been downloaded, the installation process will begin automatically as you can see in the screenshot below.
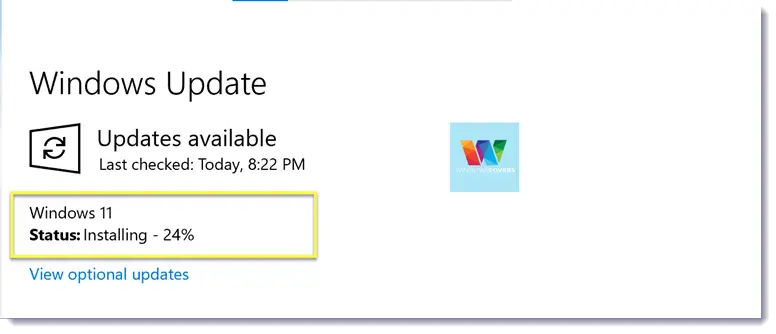
The windows 10 to windows 11 upgrade process can take up to 30mins to an hour depending upon the machine that you have or even less if you have much better hardware.
Once the upgrade process is complete, restart the computer which will initiate the final steps of the upgrade.
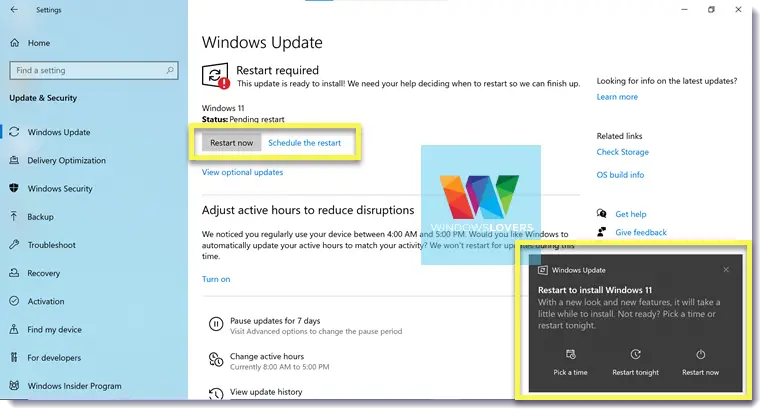
Your laptop or desktop will restart multiple times in the process, this is normal.
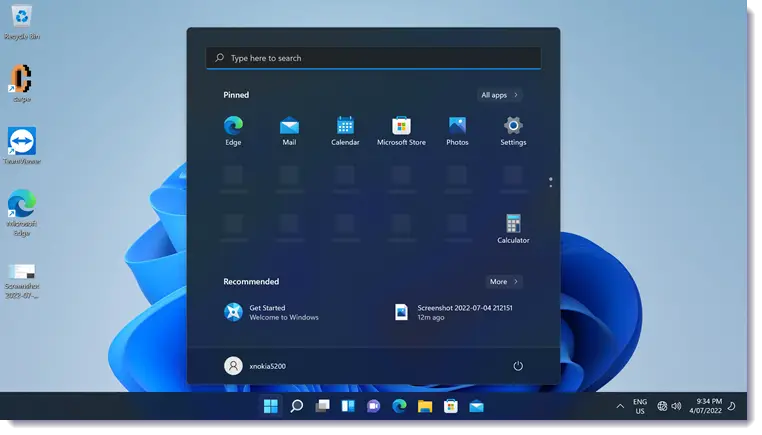
If everything goes well, you will be greeted with a brand new login screen. Since it is an upgrade from Windows 10 to Windows 11, you will be able to log in with your old credentials as everything is preserved.
You will be welcomed with one of the biggest highlights of Windows 11, which is the redesigned taskbar.
Some users might find their PC stuck on the getting windows ready page, which is normally a quick and easy fix.
Otherwise, upgrading from Windows 10 to Windows 11 without losing data is quite simple and possible.
If you run into some unforeseen circumstances, please reach out to me in the comments section below and I will try my best to find a solution to your problem.