Do you know that you can even control Windows 10 with a voice command? The voice command feature in Windows 10 is an easy-to-use interface that helps you to monitor your device using voice commands entirely.
Voice control is a simple way to complete tasks quickly. Any of Windows 10’s most common features, such as Cortana, also have built-in voice commands, making simple searches for applications or answers to questions a breeze.
This article will guide you on how to enable voice command to control various features in Windows 10. We will also discuss its importance and some problems related to the voice control command in Windows 10.
Why Use Windows 10 Voice Recognition System?
With voice command in Windows 10, it is straightforward to control various features of Windows. It is even more beneficial to people with disabilities. Owing to physical disabilities, certain people are unable to use a mouse or keyboard.
There are also people having very little knowledge about computers. They might know how to navigate to specific applications and settings. For them also voice command is beneficial.
Similarly, navigating different features of Windows with a voice assistant is fun. Whenever you feel like not using a keyboard or mouse, you can use Cortana voice assistant or Windows speech recognition feature. It is also beneficial in a situation when you are experiencing some pain in your hand.
READ: Windows snipping tool shortcut For Windows to screenshot
How to Enable Voice Recognition in Windows 10
By default, the Windows voice recognition system is not enabled. It would help if you had a little setup to enable the voice command. To activate this feature, follow the following steps.
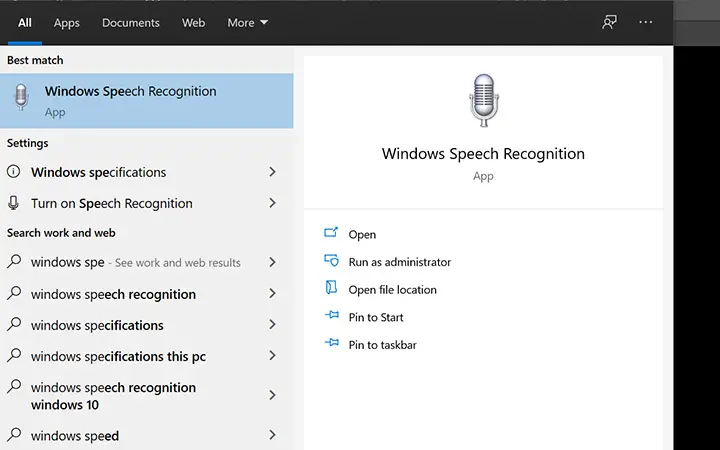
Step 1: Go to your Windows search box. There type ‘Windows Speech Recognition’ and then click the option with the mice icon.
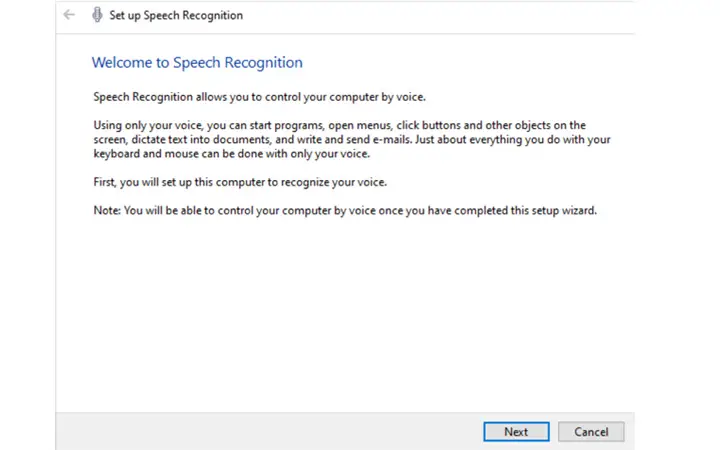
Step 2: After clicking, a speech recognition setup page will appear. On the first page, all you need to do is click on the ‘Next’ button.
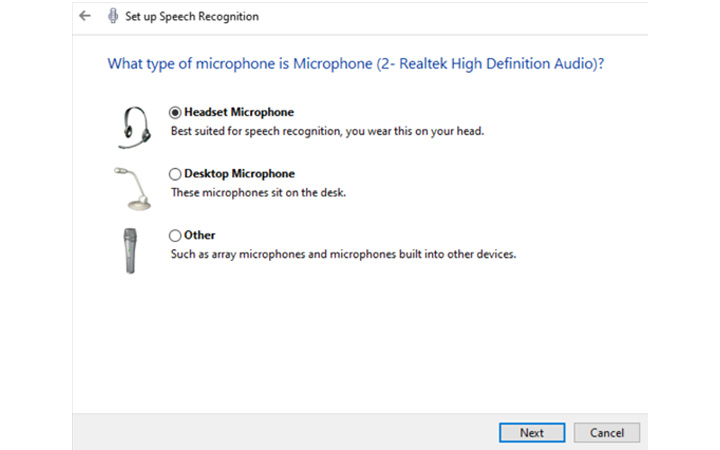
Step 3: In the next step, you have to select your microphone type. So, select your microphone type by simply clicking on the radio button and then click on the ‘Next’ button.
Step 4: In this step, read the follow the setup instruction and then click on the ‘Next’ button.
READ: How to download discord for Windows 10 PC

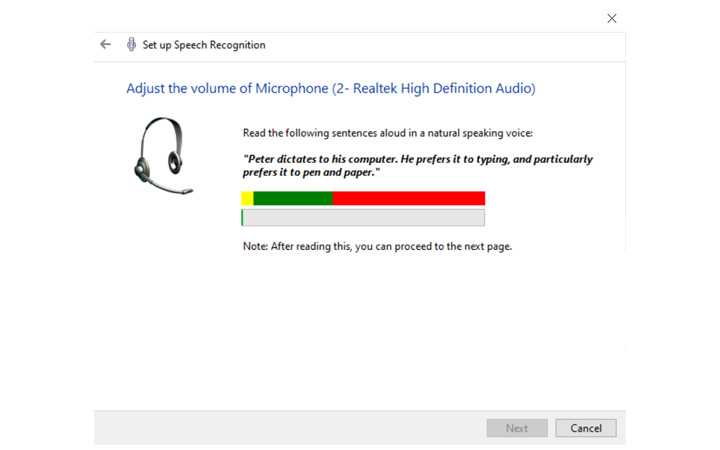
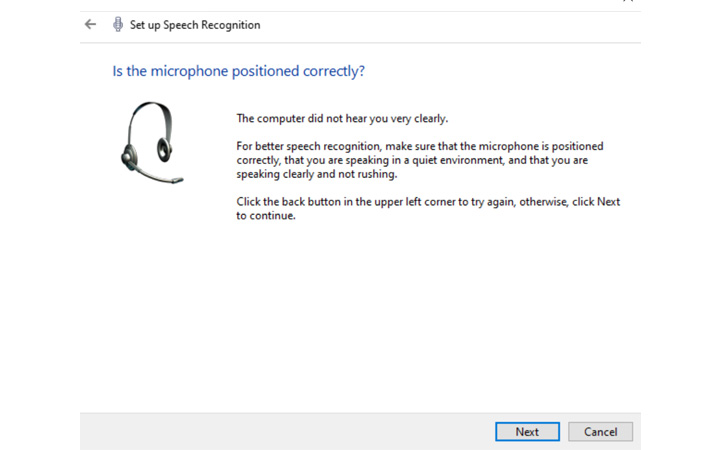
Step 5: Check that the microphone is functioning correctly and that the volume level is accurate by reading a few lines of text. After that, click on the ‘Next’ button.
Step 6: To confirm your microphone setup, click on the ‘Next’ button.
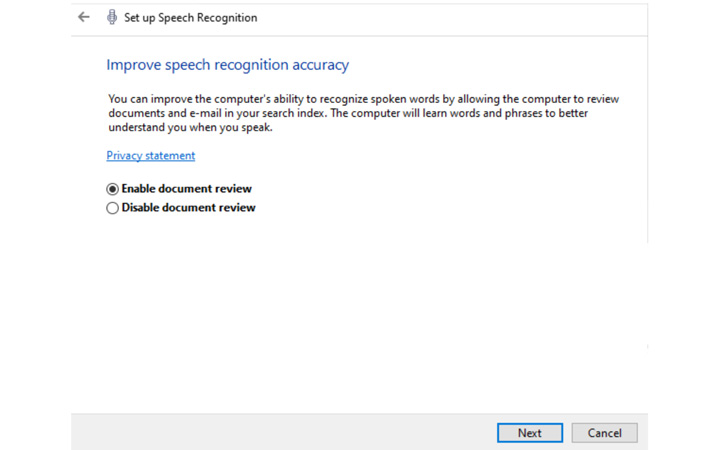
Step 7: Now click on ‘Enable document review’ to allow Windows to inspect your PC’s document and email caches, and then click on the ‘Next’ button. This will assist the operating system in comprehending the different words and phrases you use.
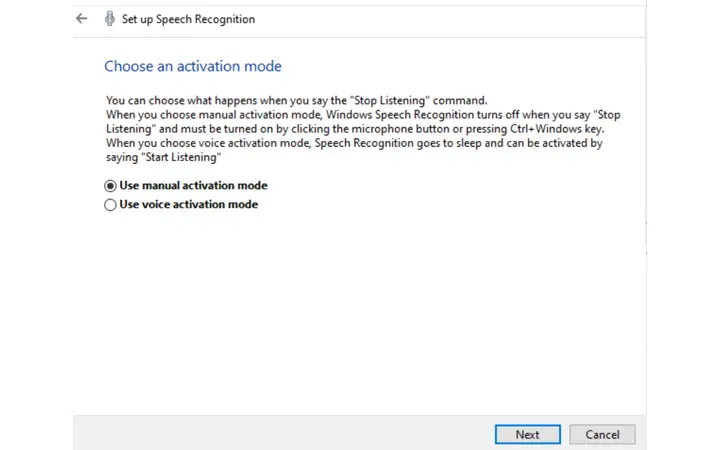
Step 8: In this step, you have to choose between manual activation or voice activation. If you choose manual activation, you have to press the Win key + Ctrl to activate the voice assistant. If you select voice activation, then simply say ‘Start Listening,’ you can activate voice assistant. After selecting your preferred type, now click on the ‘Next’ button.
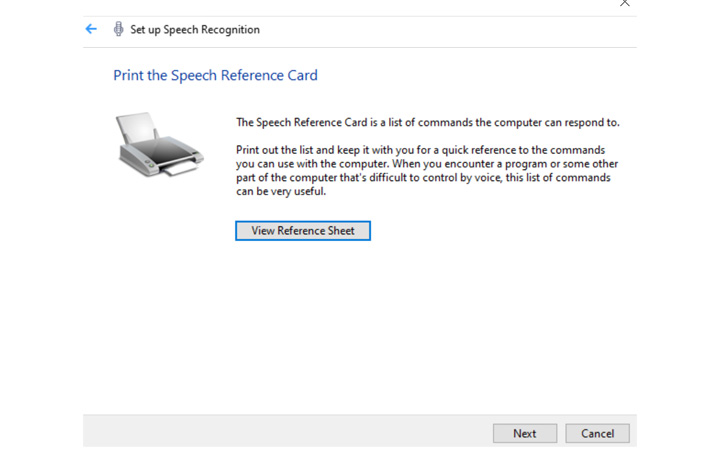
Step 9: Now select ‘View Reference Sheet.’ By choosing this, you can print the speech recognition card for fast access to the commands Windows recognizes, or you can easily bookmark this tab for later browsing.
READ: Solutions if your touchpad is not working on Windows 10
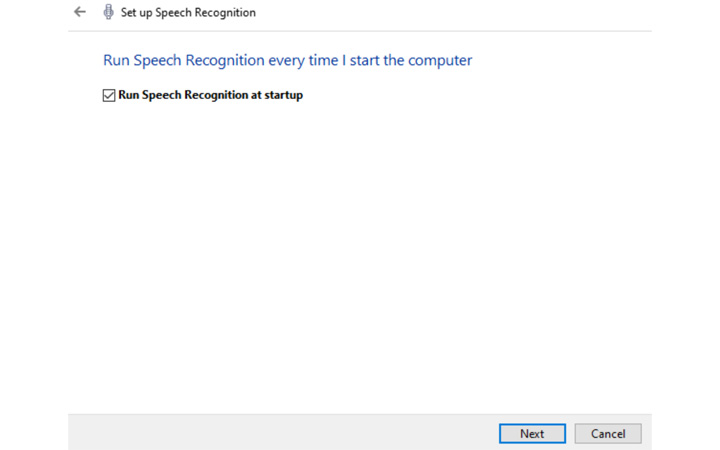
Step 10: We are almost done with our setup. In this step, tick mark the ‘Run Speech Recognition at startup’ option and then click on the ‘Next’ button. After that, either you can start the tutorial or skip the tutorial if you already know how to use the voice assistant feature.
Limitation of Windows 10 Voice Command
The speech recognition program does not necessarily correctly represent the words on the screen. Programs cannot grasp the meaning of language in the same manner as people can, resulting in mistakes that are often caused by misinterpretation.
So, the best thing you can do is to improve the accuracy of the voice recognition system. For that, go to the Control Panel > Ease of Access > Speech Recognition. There you will see the ‘Train your computer to understand you’ option better. Just click on that option, follow the instruction, and complete the training.
One thing to keep in mind for Windows 10 users: if you want to use the “Hey Cortana” voice command when Speech Recognition is turned on, you’ll get annoyed.
To get around this, use the “Stop Listening” command before using Cortana to turn off Speech Recognition. Alternatively, say “Open Cortana” and then type your request into the Cortana search box using Speech Recognition’s “typing” features.
Summing Up
In this way, you can configure your voice recognition system. You can also use Cortana voice assistant or any other third-party voice assistant. But going with the Windows speech recognition feature is very useful and effective than other third-party apps or Cortana.
I hope from this article you have learned how to set up a voice assistant to control your Windows hands-free. If you have any questions regarding this article then let us know in the comment section.