Everyone has a hurry to finish the work, and no one likes to have a slow PC in such a situation. As software becomes resource-intensive, all laptops and PCs will undoubtedly suffer slower speeds in the future, and how your PC reacts to these changes can have a significant influence on its performance. This article gives you some quick actionable tips on how to speed up windows 10 for free.
Although Windows 10 is a speedy operating system, it will eventually slow down due to various causes such as compatibility difficulties and bugs, viruses or other forms of malware, hardware issues, and more. If you find that your device is becoming slower, don’t assume you need to replace it right away. A few easy software and hardware adjustments can substantially improve the performance of Windows 10.
Today in this article, we will understand why our PC gets slow after a certain time of purchasing and see the various ways on how to speed up Windows 10 performance. We will understand the causes and then look towards the best practices that we can use to increase the lifespan of our Windows and make it fast. So, whether your PC is an old one or a new one, the tips and tricks mentioned in this article will be very helpful for your PC’s good health.
Reason Behind The Slow Windows 10 Performance
Slow performance has irritated many of us several times. Despite its slick new design and improved functionality, it may still be hard to use. So don’t worry if you’ve turned on your computer only to find that it takes an excessive amount of time to load your desktop or that your apps are operating poorly. You’re not the only one who feels this way.
Following are some of the reasons that you should be looking for is you have a slow Windows.
- Because of too many startup programs running in the background
- The drives or any Windows files may be damaged
- By running too many tabs or programs all at once
- By using an old and outdated version of Windows software and drive
- Because of your low memory capacity.
- It might be your antivirus fault. For example, while conducting a background scan, your antivirus software may be consuming processing power.
10 Solutions: How To Make Windows 10 Faster
1.Disable Startup Programs
Your Windows may get slow because of lots of load from different startup programs running in the background. Many Windows apps may be set up to start automatically on startup and then run in the background, consuming essential system resources and slowing down the user experience. There might be many apps that you rarely use but still running in the background. Such apps consume lots of memory and make your system slow.
There might be applications that are affecting your network and firewall settings. They might create DNS issues resulting in you not being able to access the internet.
To find out the auto startup programs and stop them from making your system slow follow the following steps.
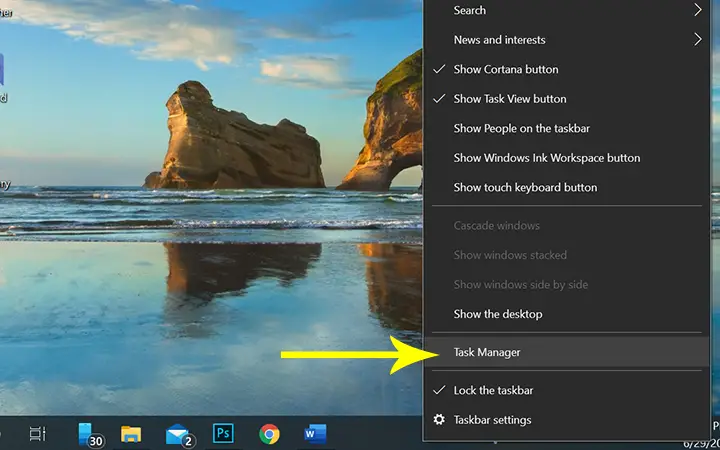
Step 1: Go to the taskbar and right-click on the taskbar. After that, a menu will appear and from that menu, click on the ‘Task Manager.’
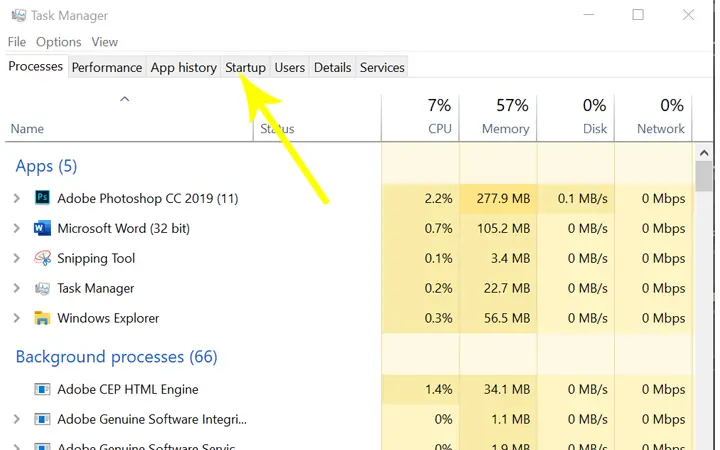
Step 2: In the task manager tab, click on the ‘Startup’ option located at the top side.
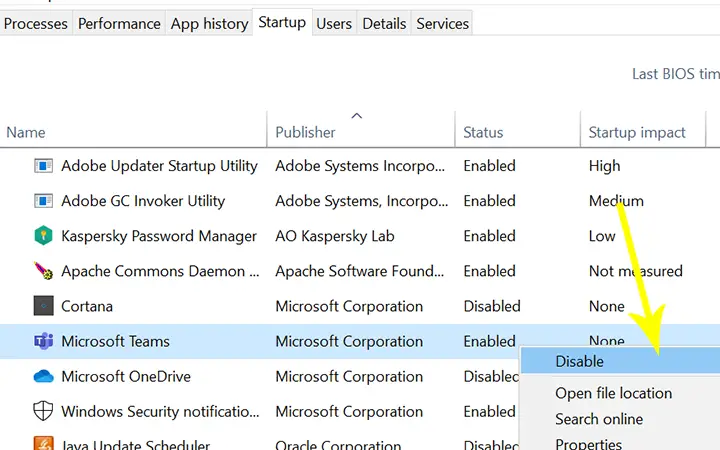
Step 3: In the startup, you will list various apps that start automatically when you turn on your PC.
Step 4: Point your mouse over the app you want to stop, and after that, right-click on that app and click on the ‘Disable’ option. Make sure only to disable the app that you don’t need.
2.Add More RAM To Speed Up Windows 10
Another reason that may cause the slow speed of your PC is the lack of storage capacity in your system. Hardware upgrades are one of the essential variables that impact the system’s functionality. As the PC becomes old and old, the storage capacity of RAM fills gradually. This is why the heavy apps in your system start to lag, and if you don’t upgrade your RAM in time, you will frequently feel the problem of slow speed.
The best way to increase the speed of your Windows 10 is to add a Solid State Drive(SSD) in your system and then shift your operating system to SSD and use HDD as external storage. SSD is the revolution that has propelled the storage device industry forward.
SSDs are significantly quicker in data transport and storage. It saves information on flash memory so that it may be accessed and saved quickly. Since a result, to make the PC quicker, the user must move Windows from the HDD to the SSD, improving the system’s performance.
3.Restart Your Computer System Regularly
When you open your PC for some important work and again if you have to restart your system, that can be time-consuming and very annoying. But restarting your system than completing your work with a slow system is better.
When you restart or shut down your computer, all open apps and processes are closed. Furthermore, the data in memory will be cleaned, which should assist in fixing the most frequent performance difficulties produced by running the operating system for an extended time.
Here is how you can restart your PC.
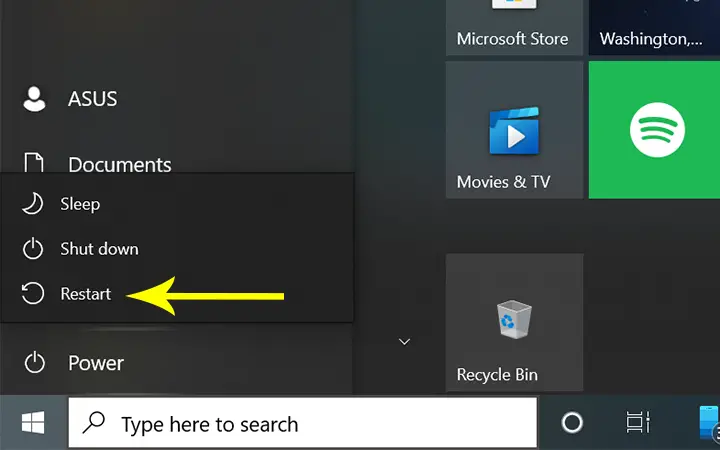
Step 1: Go to the Start button.

Step 2: Click on the power button icon.
Step 3: After clicking there, you will see a restart button. Click on that button to restart your system. You can also shut down your system and then again start if you want.
4.Check and Remove the Computer Viruses
To speed up your laptop, you should utilize good antivirus software. You can see which antivirus software is in charge of scanning and removing harmful software from your computer to help it run faster. Cleaning up these unwanted applications can make windows 10 faster.
Make sure you have an antivirus application that checks your laptop for these dangerous viruses if you want to keep your computer from slowing down. Malware, on the other hand, is not a significant source of your computer’s slowness. However, you should constantly use antivirus and security software to safeguard your hard drive, RAM, CPU, network, and firewall. To remove malware from your computer, use an antivirus program such as AVAST, NOD32, or Kaspersky.
Here is how you can scan and eliminate computer viruses.
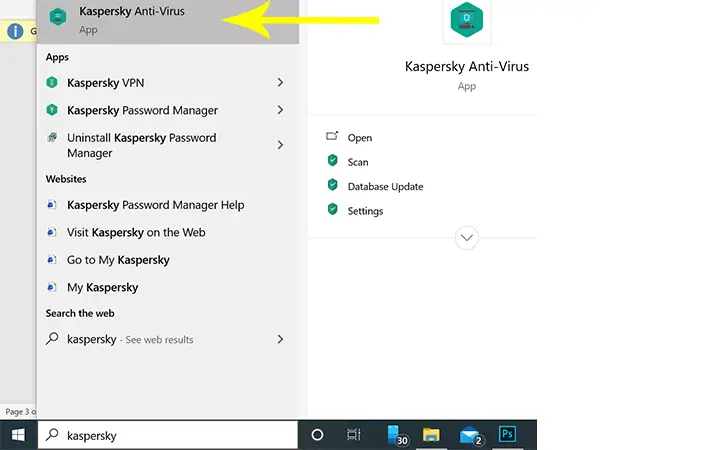
Step 1: Open your antivirus software.
Step 2: After opening, look for the scan option and click on that option.
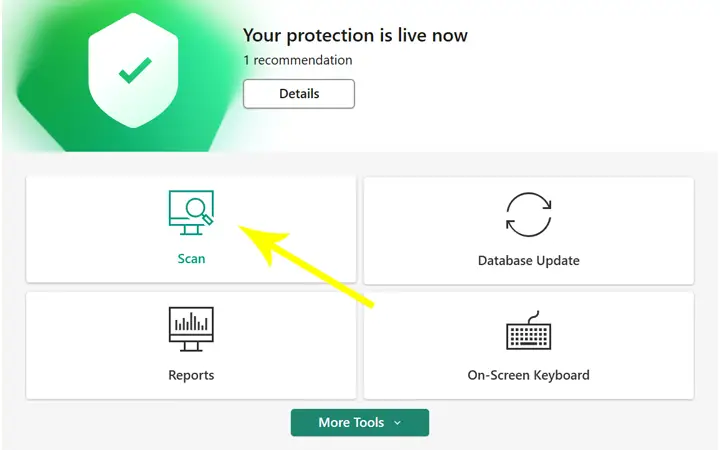
Step 3: The computer will look for viruses, and this may take few minutes depending upon your antivirus and computer system.
Step 4: Once the virus scan is completed, the antivirus will help you remove the harmful virus from your system. If you are using decent antivirus software, then you don’t have to perform scans manually. The antivirus software will have a close look at all your PC activity, but again that may also cause your system to slow down to use the manual method.
5.Upgrade your Drivers
Windows has a lot of visuals, including fading effects and flyouts, as well as animations. This improves the overall user experience by making the program seem sleeker and more polished. But it might also cause your computer to slow down.
Updates for Windows 10 happen automatically, but they don’t always download and install as soon as they become available. Depending on the update or how the device is set, It’s likely that an update to enhance speed is available if your computer is performing slower than average. A Corrupt driver can also cause a BSOD error, so its highly recommended that you update your device drivers regularly.
If you are not getting an automatic update from Windows, then see the following steps that will help you to update your old drivers manually.
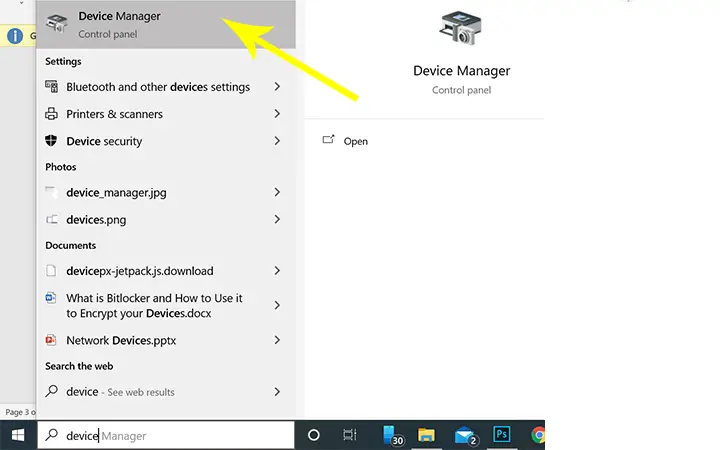
Step 1: Go to the Windows search box.
Step 2: In the search box, type’ Device manager’ and click to open the device manager.
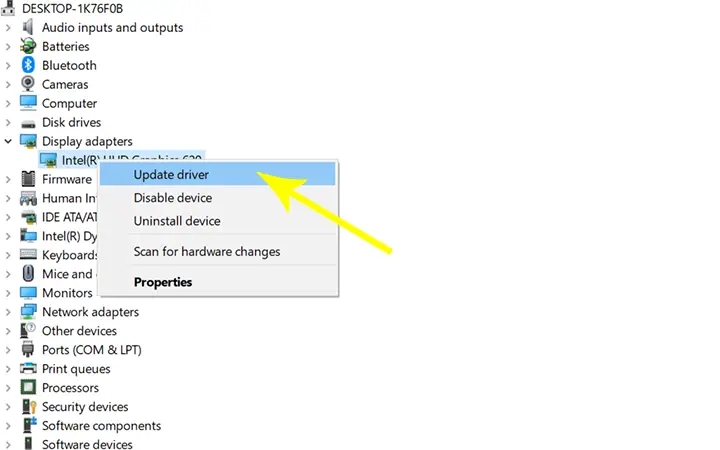
Step 3: There, you will see different audio and video drivers. Expand the driver that you want to upgrade. For example, I want to update the graphic driver of my system. Soo, I will expand the display adapter.
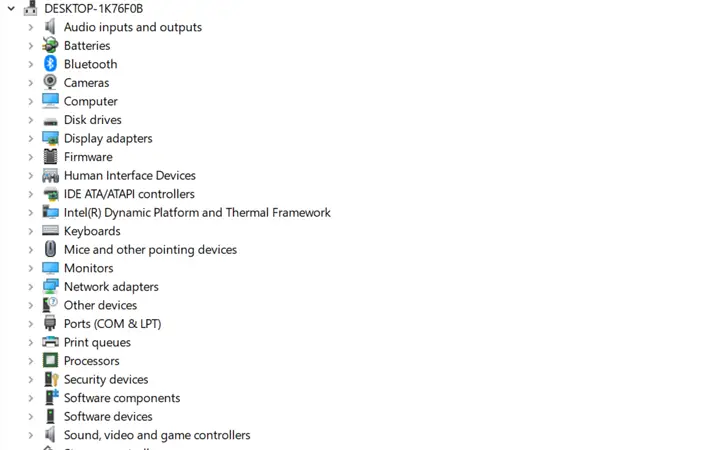
Step 4: Right-click on the driver and then click on the ‘Update driver’ option.
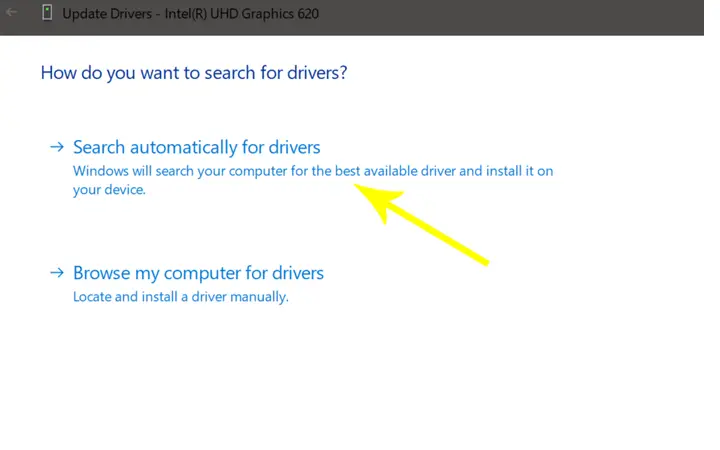
Step 5: After clicking, a popup box will appear. There click on search automatically for drivers. If the update is available for that driver, you will be able to upgrade it, and if not, the system will show you that the best driver is already installed.
6.Remove Corrupt Files and Programs
Your PC may run slow because of some corrupt or damaged files in your PC that you are not aware of. Corrupted system files may be causing performance difficulties on the device. If this is the situation, you may use the command-line tools Deployment Image Service and Management Tool (DISM) and System File Checker (SFC) to repair the configuration without reinstalling it.
Removing these files will not affect or remove any of your files saved in your windows 10 system. Even though you can easily restore majority of deleted files from windows, this process only removes the unwanted files.
So, let’s see how we can detect and remove the corrupt files in Windows 10 using DISM.
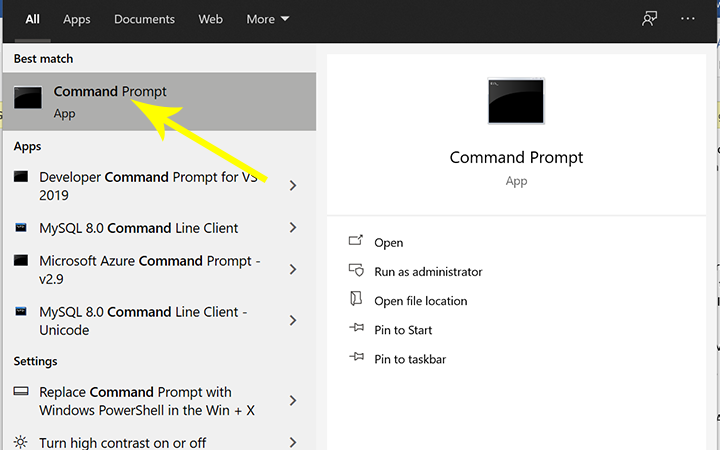
Step 1: Go to the Windows search box, type the command prompt, and then open the command prompt as an administrator.
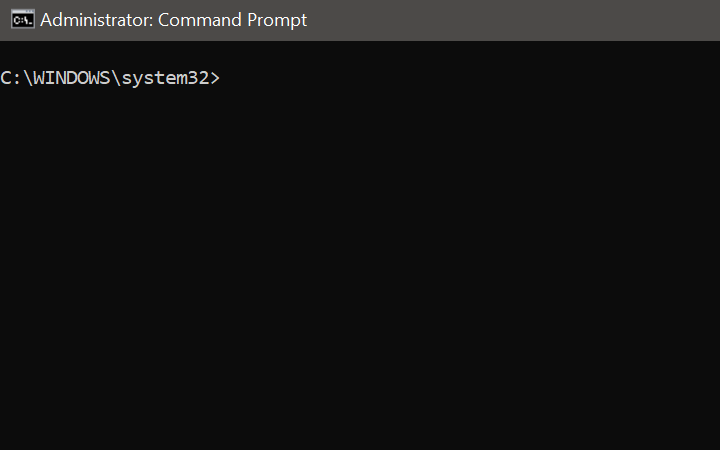
Step 2: In the cmd, type DISM/Online/Cleanup-image/Restorehealth and press enter. After that, DISM will do its work by finding the corrupt files and removing them from your system.
7.Clean Up Your Hard Drive
You might be slowing down your PC if you have a bloated hard disk full of stuff you don’t need. Cleaning your hard drive helps us create extra storage in our system and help make our system faster. Running disk clean can be the one way to free up your storage capacity. Even while Disk Cleanup has been around for a long time, it may still help you clear out the temporary files, installers, and other garbage on your hard drive.
To use the Disk Cleanup, follow the following steps.
Step 1: Go to the Windows search box and then there type’ Disk Cleanup.’
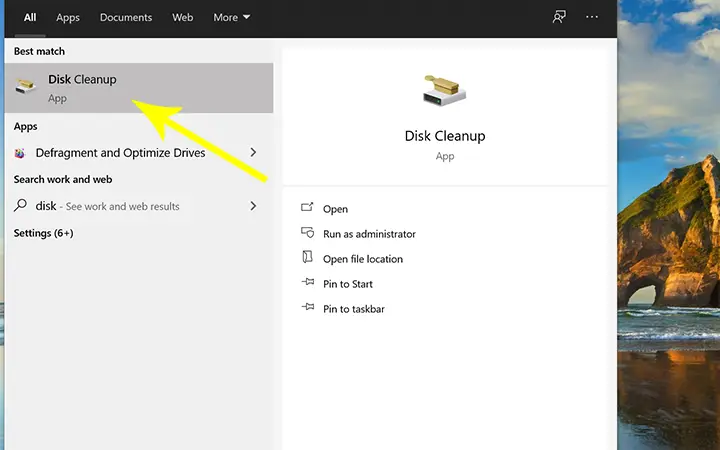
Step 2: Open the Disk cleanup and then select the drive that you want to clean.
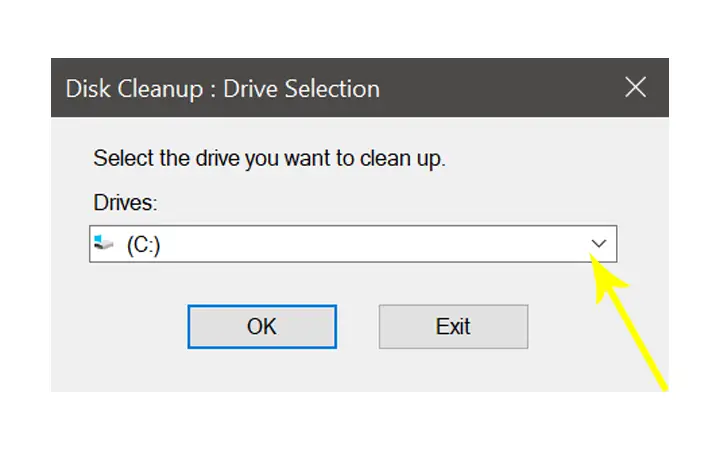
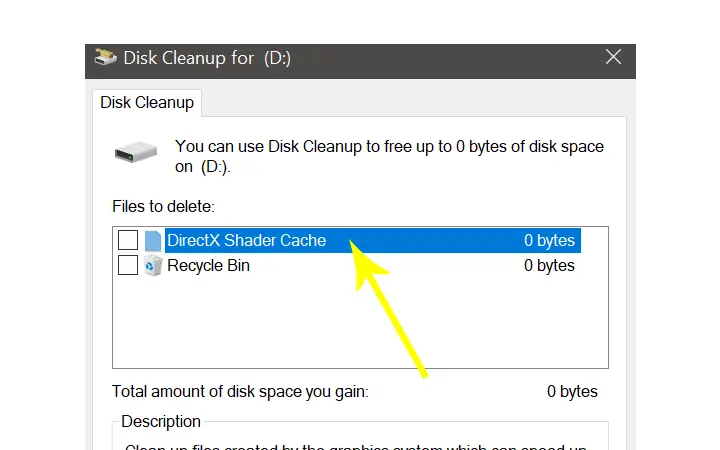
Step 3: The disk cleanup will show you all the list of files that can be deleted. Select the file, click on the Ok button, and press the ‘Delete Files’ option.
Another way is Storage Sense, a built-in feature in Windows 10, which is surprisingly beneficial for this task. To use this method, follow the following given steps.
Step 1: Go to the Windows search box and there type and open ‘Settings.’
Step 2: In settings, click on the ‘System.’
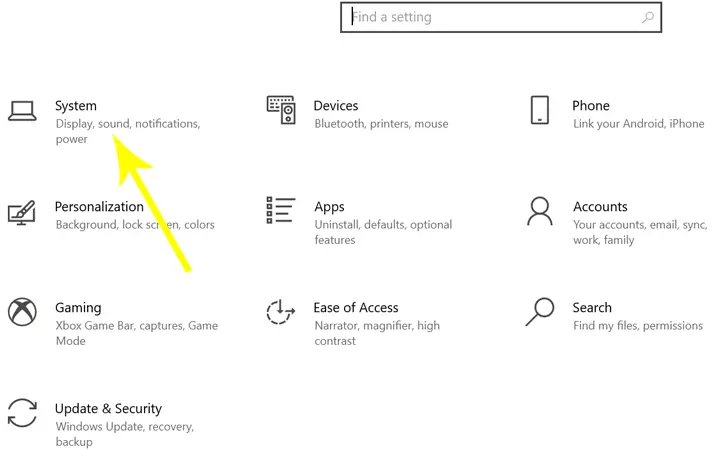
Step 3: From the left menu side, click on the storage and then toggle the off button to on.
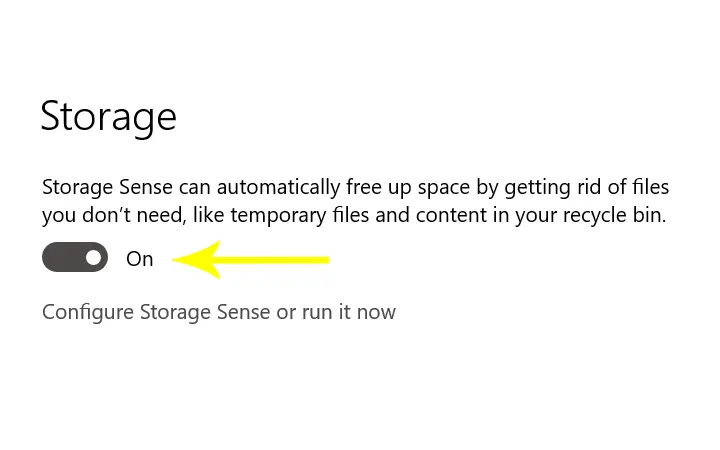
When you do this, Windows keeps an eye on your computer and deletes old trash items you don’t need, such as temporary files, files in the Downloads folder that haven’t been updated in a month, and old Recycle Bin files.
8.Reduce The Boot Menu Time-Out
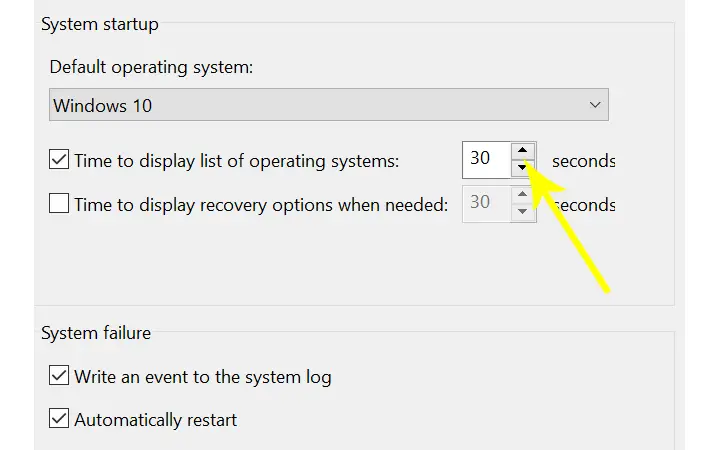
The boot menu is displayed for a set length of time when your computer starts up before the operating system loads. This allows you to accomplish tasks such as starting Windows in Safe Mode. By adjusting the boot menu time-out, which is set to 30 seconds by default, you can save a few seconds off your starting time.
To reduce the boot menu time-out, follow the following steps.
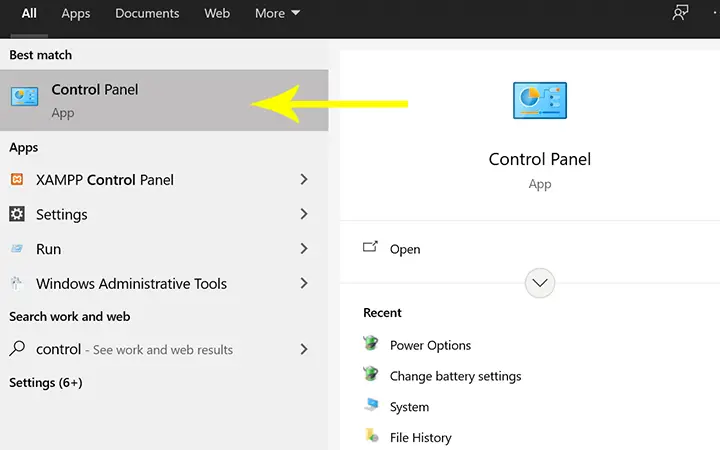
Step 1: Go to your Windows search box and there type and open ‘Control Panel.’
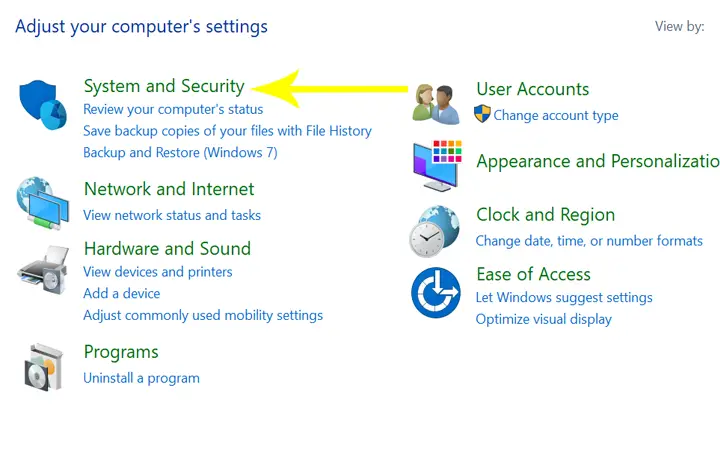
Step 2: After opening the control panel, click on the ‘System and Security’ option.
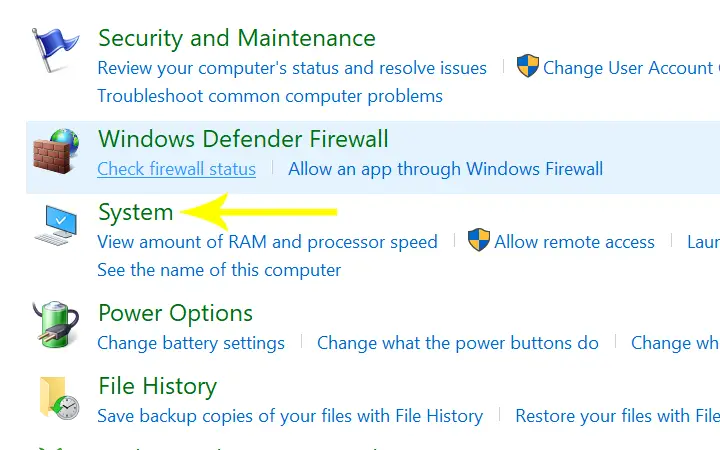
Step 3: In system and security, again, click on the ‘System’ option.
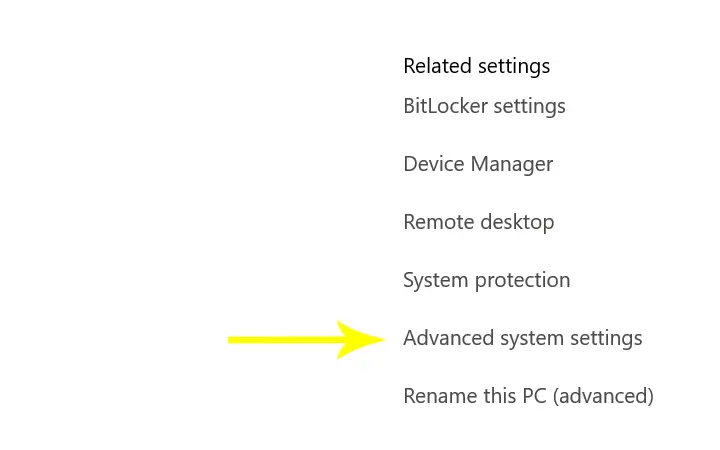
Step 4: On the right side of the screen, you will see advanced system settings. Click on that option.
Step 5: Now, all you have to do here is click on the ‘settings’ of Startup and Recovery section and then change the 30 second time to 10 seconds and press the Ok button.
9.Disable Automatic Updates
Updates are essential to keep your device up to date and protect it from various security threats. If you disable all automatic updates, your laptop may become open to significant security flaws. But disabling the updates has some good sides also.
As an example, let’s say you’re utilizing a laptop to play games. There’s a good chance that game distribution systems like Steam and Epic Games may store numerous big upgrades and patches on your PC at that time. Therefore to run the Games, your software and hardware must be compatible with the current upgrades.
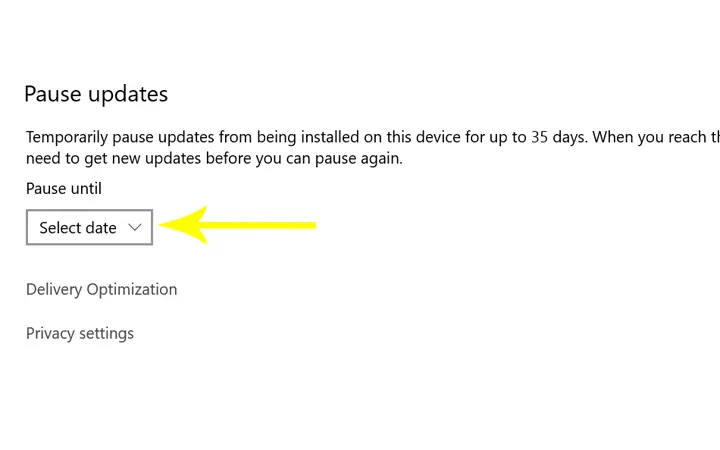
To disable the automatic updates, follow the following steps.
Step 1: Open the settings.
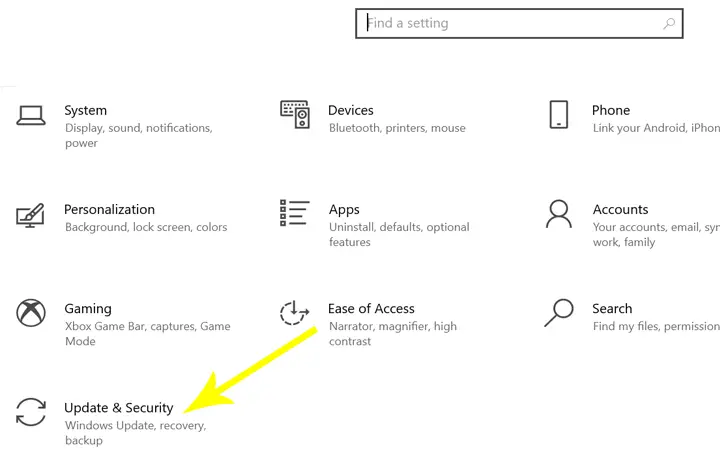
Step 2: Click on the update and security.
Step 3: Then go to the advanced option.
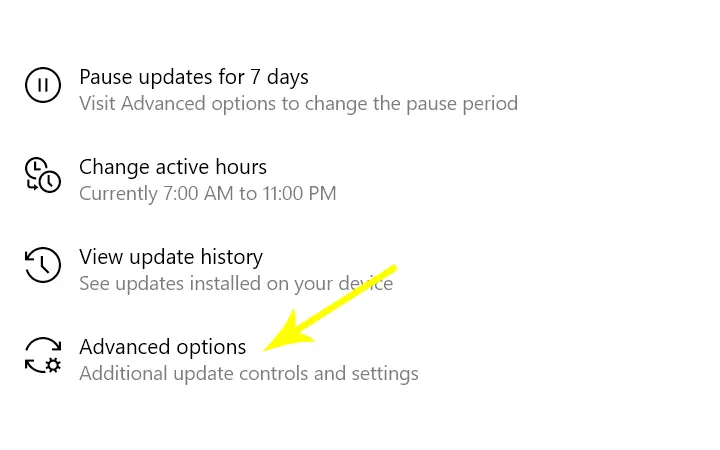
Step 4: In the advanced option, scroll a little bit, and under pause updates, select the date until you want to stop receiving the update.
10.Switch To Better Power Plan To Speed Up Windows 10
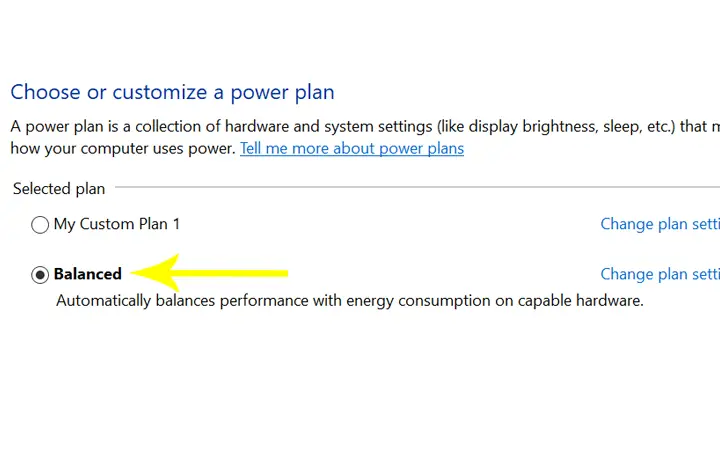
If you don’t need to, make sure you have not enabled a Power saver plan. Even desktops will occasionally include a power-saving option, which is useless unless you attempt to preserve battery life. To save energy, the power saving plan lowers your PC’s performance. Changing your power plan from ‘Power saving’ to ‘High performance’ or ‘Balanced’ will increase your performance immediately.
To change the power plan, follow the following instruction.
Step 1: Open your control panel.
Step 2: In the control panel, click on the ‘Hardware and Sound.’
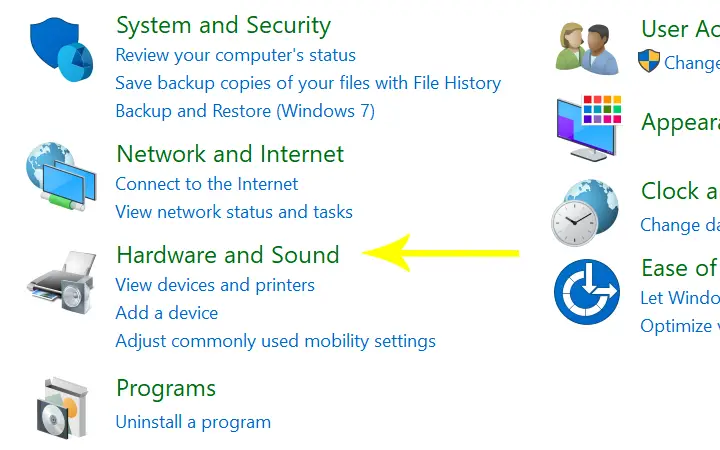
Step 3: There, you will see the power option. Click on that option.
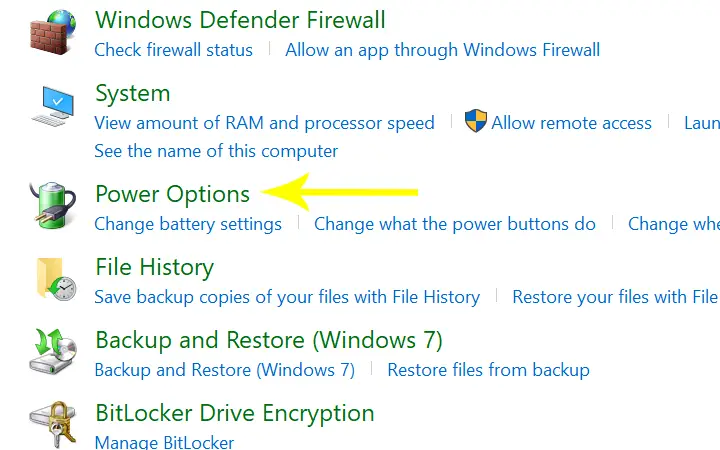
Step 4: Now, choose a power plan from power saving to a balanced or high-performance mode.
Conclusion
From this article, I hope you have understood how to speed up Windows 10 performance. The above mention methods will definitely increase the speed of your Windows 10. But if you want to see the big difference in your PC, you should upgrade your hardware and use the latest SSD for storage. Using the SSD will increase the storage capacity and provide a significant boost to your PC.