On a Mac, there might be various possible ways from which you can delete your files. If you are worried about your deleted files, then don’t take much tension because, luckily, we have various methods to recover deleted files in Mac.
Accidental data loss is a problem that many Mac users are familiar with. If you’re using an older Macintosh or the more recent MacBook Pro, it’s still possible that any vital data will be lost. This can be a frustrating situation that must be handled quickly.
You can restore lost files on Mac using Mac hard drive repair tools, erase options, time machine backup files, and a terminal command if you’ve drained the Trash. In this article, we will learn the five different methods to recover permanently deleted files on Mac.
Five Ways To Recover Deleted Files In Mac
1.Recover Files From Trash
Have you mistakenly removed the files by moving them to the garbage can or right-clicking them and selecting the ‘Delete’ button? You can retrieve files from the garbage if you haven’t yet drained the trash can or erased the files permanently.
To recover the deleted files from the trash bin, follow the following steps.
Step 1: From the desktop icon, locate the trash bin icon and then click it to open the trash bin.
Step 2: Then, search for the files that you want to restore.
Step 3: Now drag the files you want to restore to the desktop. To restore deleted files on Mac from the Trash, right-click on them and choose ‘put back.’
Step 4: The archives will be restored to their previous locations. Now you can check your folder from where you have deleted the files previously.
2.Using Time Machine Backup Option

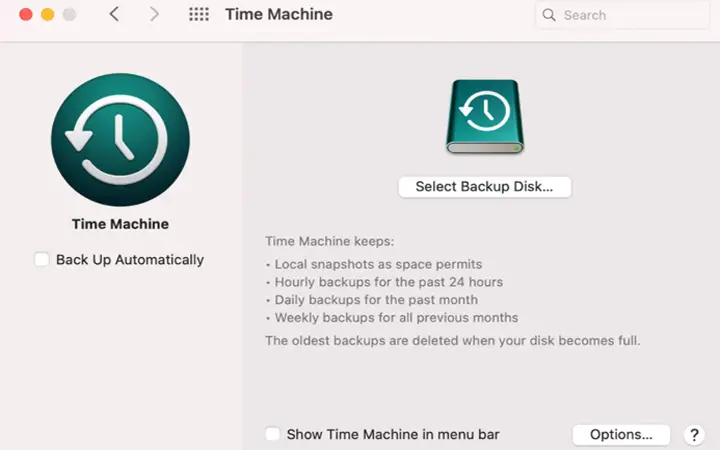
Some types of recovery software can be used to restore lost files on a Mac. Both Macs running macOS 10.5 or later come with Time Machine, an incremental recovery utility that lets users recover the entire operating system or individual files from a local backup saved on a dedicated backup disk.
Follow the following steps to recover your file using the time machine.
Step 1: On the Mac, open Time Machine. You will access Time Machine by clicking the icon in the menu bar or using Spotlight to look for it.
Step 2: Click to open the Time Machine and select the folder in which your goal files were previously stored.
Step 3: Scroll through backup archives until you see the missing files, then click the upward arrow to the right of the Time Machine window.
Step 4: To save the deleted items on Mac, hold down the Command key and pick the target files. Then press ‘Restore.’ The deleted file would then be restored to its previous position.
3.Recover Deleted Files On Mac Using Terminal
From the terminal, you just have to hit one command line, and that’s all. It is an excellent method to restore your files. However, on a Mac, the Terminal command will only restore lost files from the Trash. If your Trash is complete, use a Mac file recovery program to save your files.
Follow the following steps to recover your file using the terminal.
Step 1: First, open your terminal app. For that, go to applications, then utilities, and from there, tap on the terminal.
Step 2: In terminal, type ‘ cd.Trash’ and then press the return key.
Step 3: Then again, type ‘mv filename../’ and press return. Here change the filename with the name of your file that you want to restore from the trash bin.
4.Recover Deleted Files From Undo Method

If you mistakenly deleted essential files on your Mac, the ‘Undo’ option will quickly restore them. Though, you should do so as soon as possible after deleting the files. It’s no longer valid after you’ve emptied the Trash or deleted files indefinitely.
Follow the following steps to recover your file using Undo method.
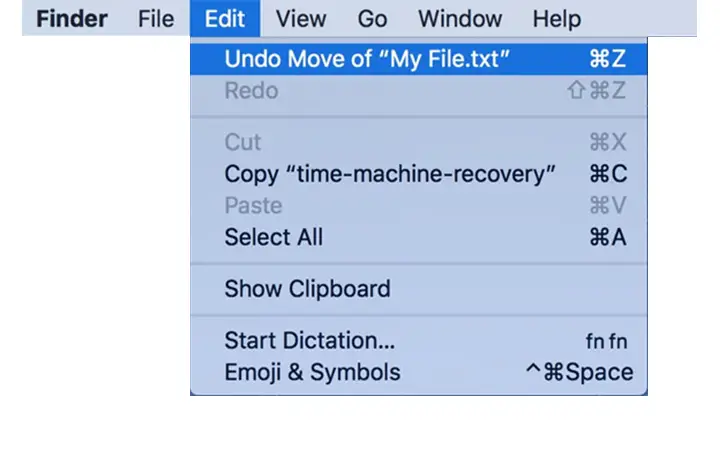
Step 1: After deleting something, go to the top navbar and click on the Edit button.
Step 2: After clicking on the ‘Edit’ button, select the undo move option to reverse your action.
Step 3: You can also use a shortcut key for this operation. To undo simply press the command + Z key.
5.Use Data Recovery Software
If the above approaches fail to get back or restore permanently lost MAC files, it’s time to switch to the MAC recovery Software tool. There are various paid and unpaid data recovery software that you can use to restore your temporary and permanently deleted files.
To demonstrate the use of data recovery software, we will use the disk drill method. For that, follow the following steps.
Step 1: The first thing you have to do is to download the software. To go to the download page, click here.
Step 2: Install the disk drill software and then launch it to start with a disk drill.
Step 3: Disk Drill will ask you to pick your disk and run a scan the first time you open it. If you want to scan your main primary disk, choose OS X. The scan may take a few seconds, but you’ll be faced with a list of recently deleted files once it’s completed.
Step 4: And after you’ve located the data you’re looking for, you must double-check that they’re recoverable. There’s a thing called Preview, for example. It’s built into Disk Drill, and it allows you to see a complete snapshot of the file and an intact file preview.
Step 5: Now, to restore, right-click on them, choose ‘Recover,’ and then pick the location where you want the bring back files to be saved.
Conclusion
Above are some of the best ways to restore the deleted files in Mac. I hope by applying the above steps, you were able to restore your important deleted files. If you have any queries regarding this article, then let us know in the comment section.
Other macOS Articles