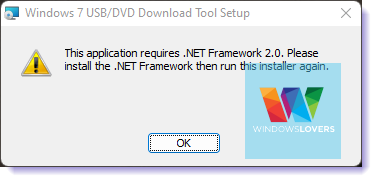
Windows 11 is great, but I use many old applications built on the .NET 2.0 or 3.0 Framework. I encountered this issue while trying to create a bootable Windows 7 USB tool in Windows 11 with the official USB creator tool.
The error message “This application requires .NET Framework 2.0. Please install the .NET Framework then run this installer again” persisted.
Some users have reported that they are facing this issue while trying to use the iPad as a second monitor in Windows 11 using Spacedesk.
And like any regular user would do, I tried to download and install .NET Framework 2.0 and 3.0 in Windows 11. It worked great, but you don’t have to download and install these files. You can enable the .NET framework on Windows 11 in a few clicks.
1. Enable .NET Framework 2.0 or 3.0 on Windows 11
Windows 11 is shipped with the latest version of the .NET framework installed on it. The Framework is what the application developers use as the base for their applications.
If one tried to use an application built on earlier Frameworks, for example, .NET Framework 2.0 or 3.0, you need to enable these frameworks on your Windows 11 desktop/laptop first.
To enable .NET Frameworks in Windows 11, please follow the steps below:
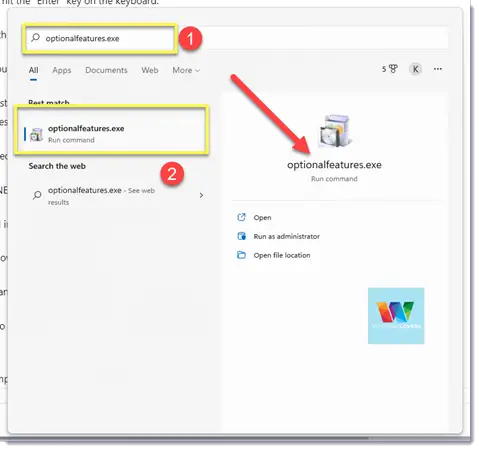
Go to “Start” and search for “Optionalfeatures.exe” and open it.
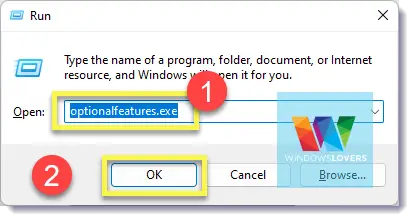
Alternatively, hit the “Windows” + “R” key on your keyboard simultaneously which will bring up the RUN.
Enter – optionalfeatures.exe and hit the “Enter” key on the keyboard.
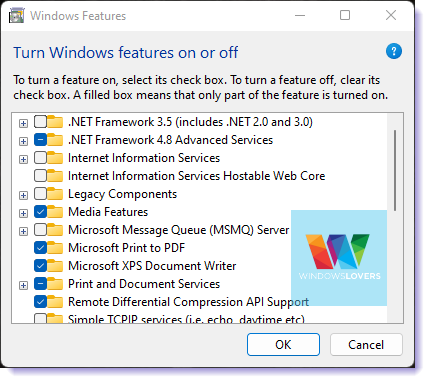
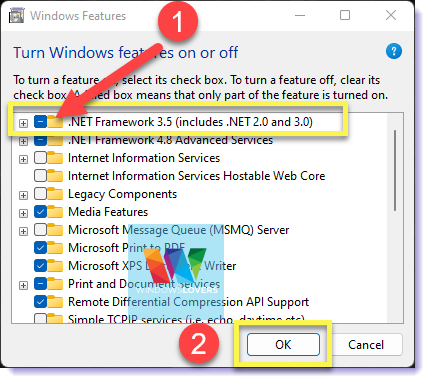
A small window should open with the title “Windows Features” on the top as you see in the screenshot below.
If you have a different screen, you probably opened the other optional features in Windows 11.
Since you have been asked to install .NET framework 2.0 or .NET framework 3.0 on your Windows 11 computer, you will find that the “.NET Framework 3.5 (includes .NET 2.0 and 3.0) is unchecked.
The .NET Framework 4.8 Advanced Services should be checked or have a blue-colored icon at least.
Click on the check box next to .NET Framework 3.0 and click on “OK”.
Make sure you have a functional internet connection so that the installer can download the required .NET installer files.
Click on “Let Windows Update download the files for you”.
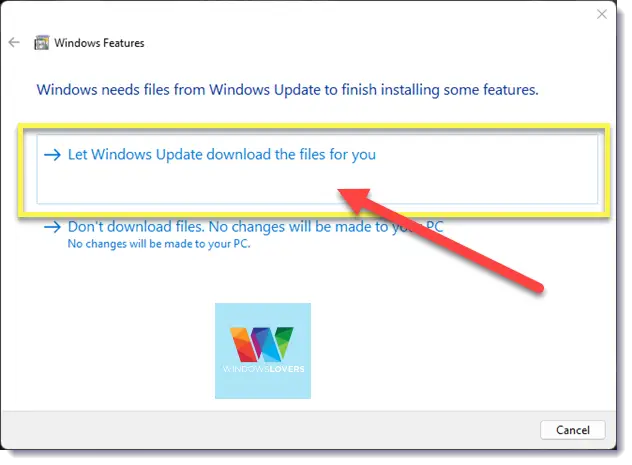
Windows 11 will now go ahead and download the installer for .NET Framework for Windows 11 and install it automatically.
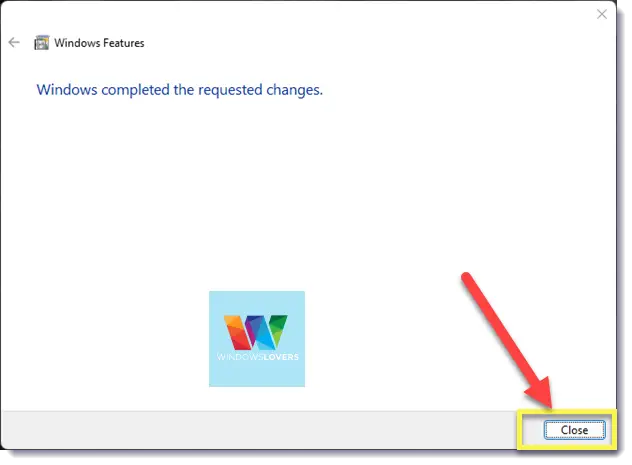
The final step of this process is to restart your Windows 11 system to apply the changes and complete the process of enabling the framework.
Once you see the “Windows completed the requested change.” window, click on “Close”.
Restart your Windows 11 desktop/laptop and see if the “The application requires .NET Framework 2.0 or 3.0 …….” error still persists.
If you are facing the “The application was unable to start correctly 0xc00007b” error, there might be other issues you might have to fix as well on top of this.
2. How To Install Older Versions In Windows 11
If for some odd reason, you are still not able to run an older application on Windows 11 because of Framework conflicts, you can try to download and install any version framework you are after manually.
Microsoft provides standalone installers for almost all the new or older versions of its .NET Framework for anyone that wishes to download them.
To manually download and install them on Windows 11, follow the steps down below:
Depending upon which version you are after, click on the links down below that will take you to their respective Microsoft downloads page.
Once you are on the downloads page, click on download to initiate the package download.
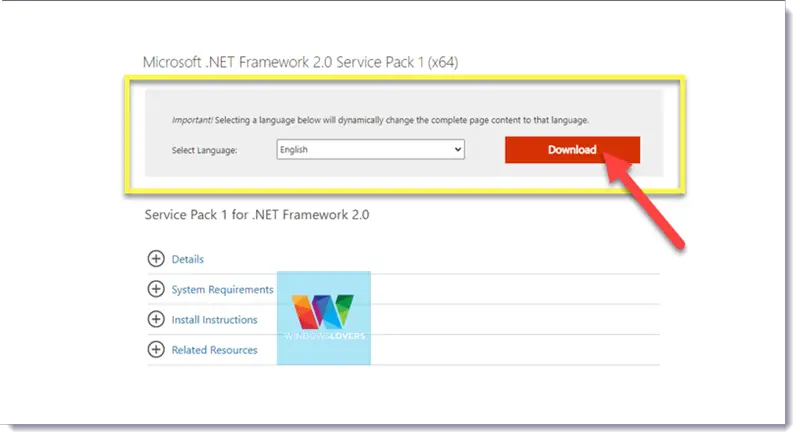
Open the installer once the download is completed. The installer is not a full offline standalone version, so it will need an internet connection to download the respective files from Microsoft.
If you are looking for the standalone offline version from Microsoft, let me know in the comments section and I’ll help you out.
As you can see in the screenshot below, I am trying to install the .NET Framework 3.5 which includes .NET 2.0 and 3.0.
Click on “Download and install this feature”.
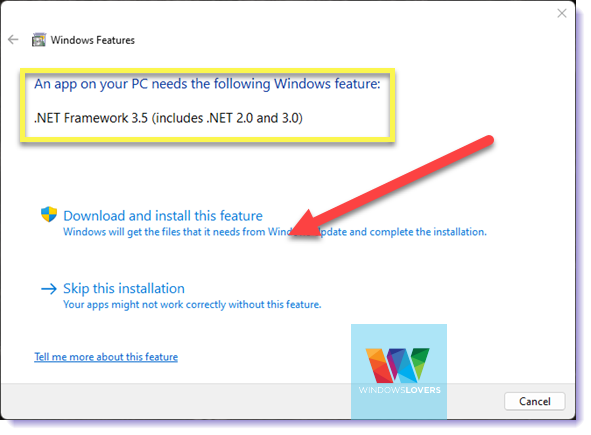
Similar to the earlier process where I enabled the feature, this installer will also download the required files, install them on your Windows 11 system and let you know once this is completed.
Once the installation is completed, you will see the installation completion window.
You can now either try running the application that required the Framework or restart your Windows 11 desktop/laptop to make sure all the necessary steps are completed.
That’s how you can enable or install .NET Framework in Windows 11. If you come across any other issues while following this step-by-step guide, please let me know in the comments section down below and I’ll help you out.