I still remember the times when you had to use a CD to install Windows XP and later on DVDs for Windows 7 and so on. Once bootable USBs became the new thing, life became way easier and the process also did not take forever. Also eliminating the possibility of the installation crashing halfway through because of scratches on the CD/DVD. Let’s see how you can use Novicorp WinToFlash to create a bootable USB for Linux(Ubuntu), Windows 7, XP, and other operating systems.
Novicorp is a fairly older application so it might not work as it used to on older systems. There are other ways to create a bootable USB too which I will make sure to direct you to them in this guide.
How To Use Novicorp Wintoflash
Wintoflash is freeware and can be downloaded from Novicorp’s website.
The installation is pretty straightforward as well.
On the first run after the installation, you will be prompted to enter the product key. Just select the free version (Ads will be enabled).
After that process is done, you are all set to use Wintoflash to create bootable USB drives.
1. Novicorp WintoFlash Linux Bootable USB Drive
Wintoflash is mostly popular among users who are trying to create wintoflash windows 7 bootable USB drives.
But you can still use the app to create a Linux bootable USB drive with ease.
- Download the Linux image that you prefer first.
- Make sure the USB has enough capacity for the image to be written on.
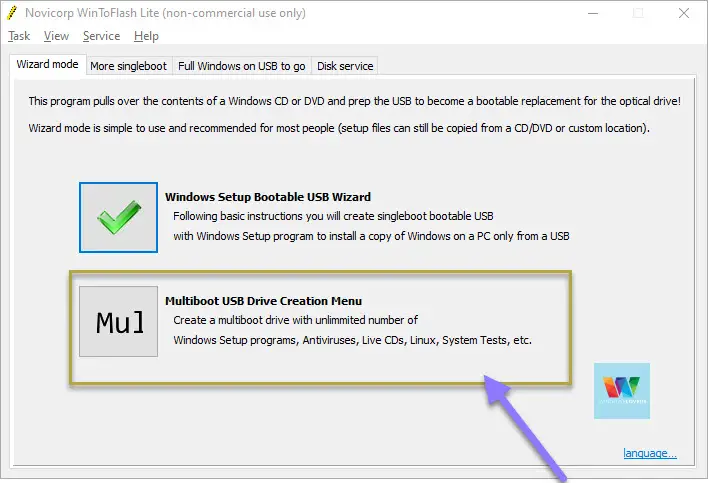
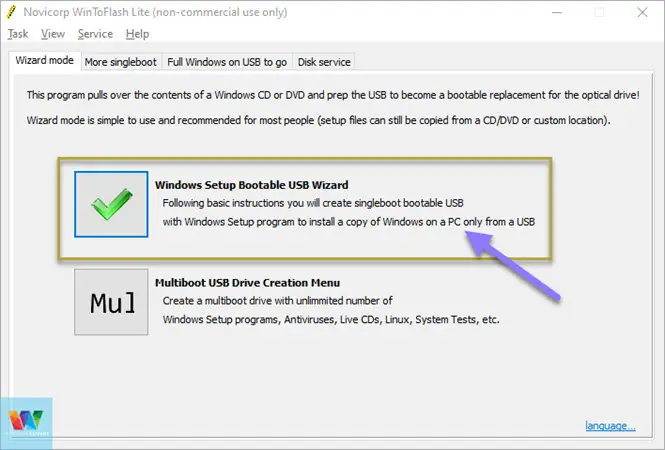
- Run Wintoflash and click on “Multiboot USB drive Creation Menu”.
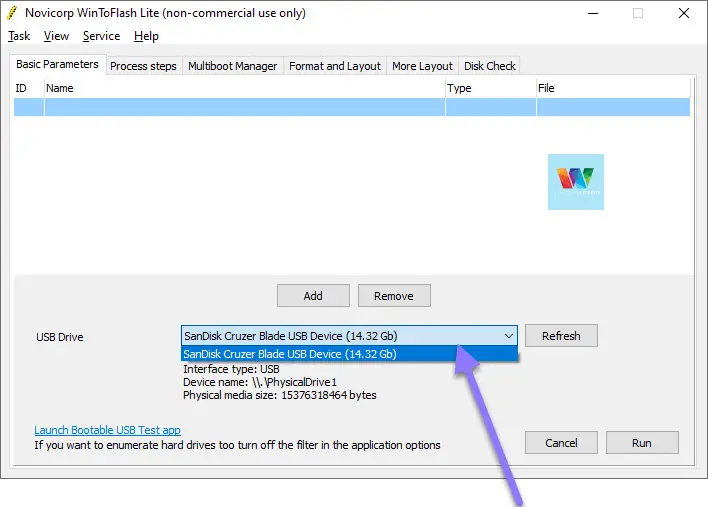
- Select your USB drive from the list. if you don’t see your USB listed, hit “Refresh”.
- Click on “Add”.
- Select “Linux” as the type of item and select the type of linux you have. You can search for the OS using the search box.
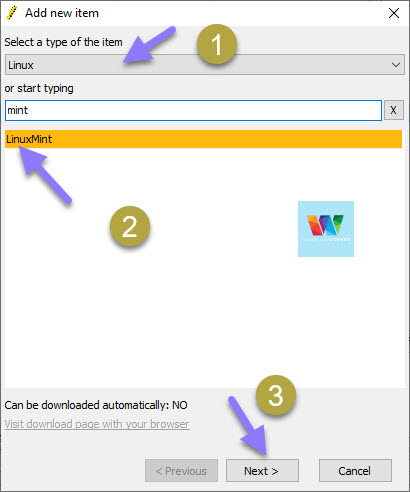
- Once selected, click on “Next” and select the ISO image from your harddrive and hit “Add”.
- Finally, click “Run” on the bottom-right corner of the page and the program will start writing the image to the USB drive and creating a bootable USB.
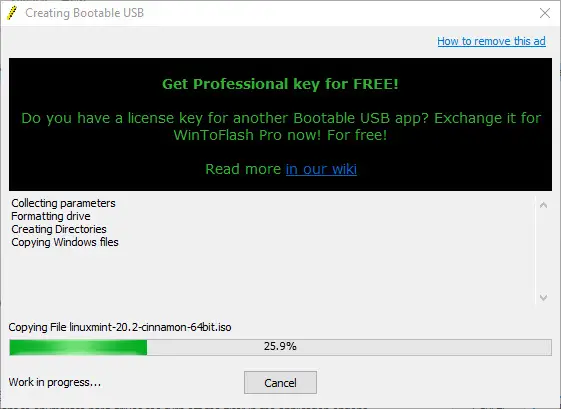
- After the process is completed, your Wintoflash Linux bootable USB drive is all ready to go.
There might be times where it might look like the application is not doing anything. That is normal, as long as it does not say “Not responding”.
2. Create Wintoflash Windows 7 Bootable USB
To create a bootable Windows 7 USB, follow the following steps:
- Download Windows 7 ISO file, make sure you have a serial key. We are strictly against piracy and illegal use of premium software and applications.
- Download and install Novicorp Wintoflash, like mentioned earlier.
- Open Wintoflash and click on “Windows Setup Bootable USB Wizard” from the dashboard and click “Next”.
- Choose “I have ISO image…”.
- Click on “Select” and locate the Windows 7 ISO file and the USB drive.
- If you do not see the USB drive located, reconnect and click “Refresh”.
- Click next and wait for the application to complete the writing process.
That’s how you can create a bootable Windows 7 USB using WintoFlash.
The process to create a Novicorp Wintoflash for Windows 10 is exactly the same. You need to download Windows 10 ISO file beforehand.
3. Create Bootable Wintoflash Windows XP USB Drive
Windows XP has been a thing of the past now. But if you are feeling nostalgic or have a really old system that does not really support any other operating system, you can use Wintoflash to create a bootable Windows XP USB drive.
- First download Windows XP ISO File.
- Install WinToFlash on your computer for free.
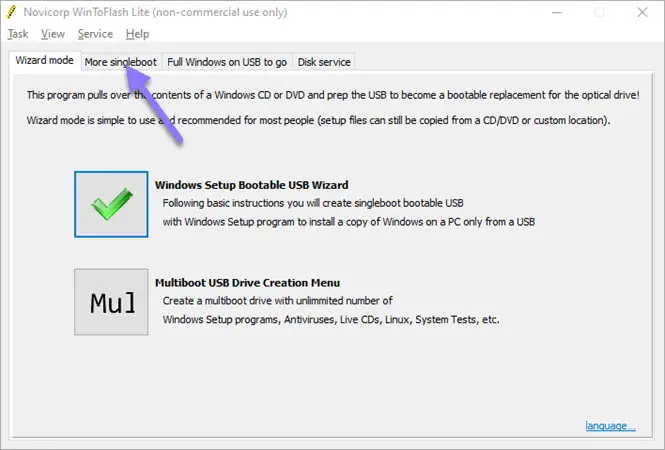
- Run the application and go to the “More singleboot” tab.
- Select “Windows XP Setup…..” and click “Create”.
- Locate the Windows XP iso file and the USB drive respectively.
- Once done, click on “Run” and let the application create a bootable Windows XP drive for you.
Once completed, your Windows XP bootable USB will be ready for use. The application will give you any prompts if it faces any issues.
What I suggest you do is to enable the check for any errors on the USB drive.
To do that, click on the “Process steps” tab, and at the bottom, enable the “Check the USB drive for error” and then run the USB creation process.