Installing apps on Windows is easy. But fully uninstalling them — including all those leftover files, cache data, and registry entries — is a different story. That’s where Revo Uninstaller comes in.
Whether you’re a casual user or someone who frequently installs and removes software, Revo gives you the tools to perform a deep clean when uninstalling apps. If you’re on Windows 10 or macOS and want to compare built-in uninstall options first, check out this guide on how to uninstall programs on Windows 10 and Mac.
In this guide, I’ll walk you through the complete process of using Revo Uninstaller to remove any app along with all its associated data, safely and thoroughly.
Why Not Just Use Windows Uninstall?
The built-in uninstaller in Windows does a decent job, but it often leaves behind files, folders, and registry entries that can clutter your system over time. These leftovers:
- Waste storage space
- Cause conflicts when reinstalling software
- Slow down system performance
And if you’ve ever tried reinstalling an app only to find it behaving strangely, leftover configuration or registry settings might be to blame. That’s why using a tool like Revo Uninstaller — which scans deeper into your system — helps ensure a truly clean uninstall.
1. How to Install Revo Uninstaller on Windows
- Head to the official website: revouninstaller.com.
- Click the Free Download button. If you’d prefer advanced features, paid plans are also available.
- Choose where to save the file and begin the installation.
- Follow the installation prompts:
- Run the installer
- Accept the license agreement
- Choose an install location
- Click Install, then Finish
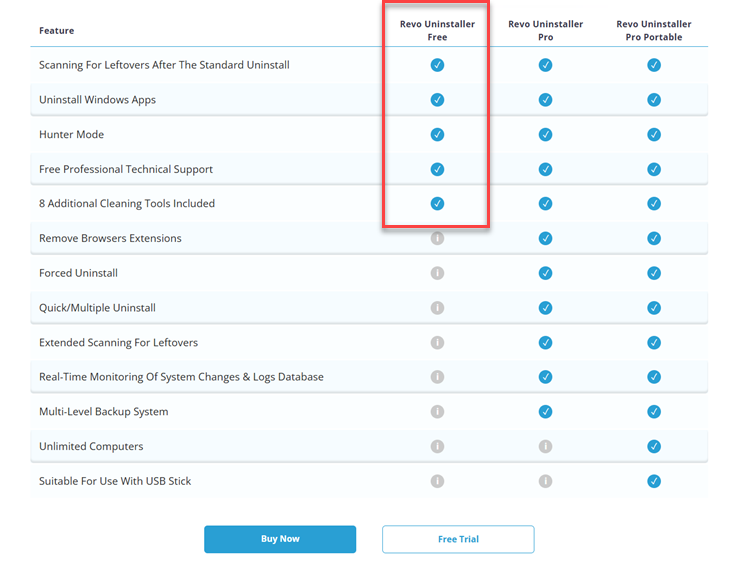
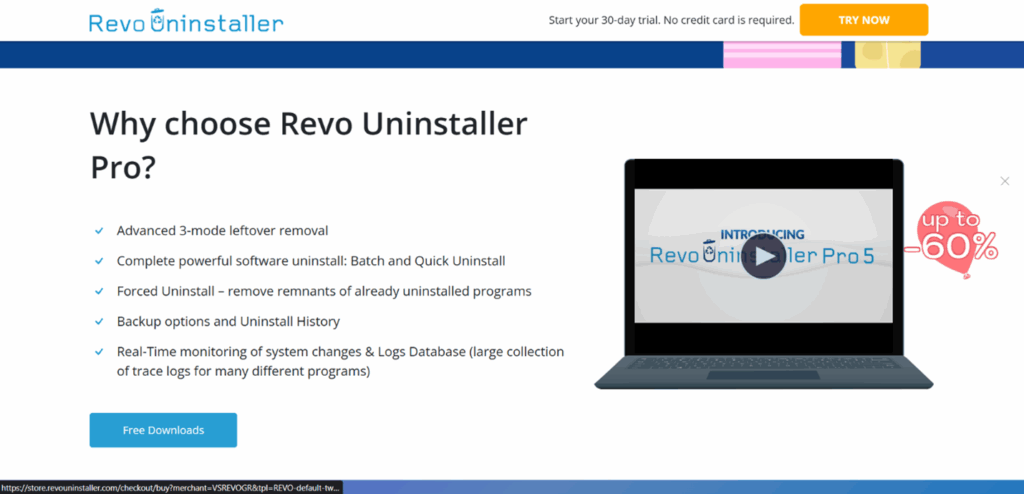
✅ Tip: The free version includes core features like:
- Advanced leftover scanning
- Support for uninstalling Windows Store apps
- 8 additional cleaning tools
- Free technical support
If you’re someone who installs apps often — whether you’re testing software, gaming, or customizing your setup — having Revo on standby saves time and system headaches down the road.
2. How to Uninstall an App Using Revo Uninstaller
Let’s go through the full uninstallation process step-by-step. For this example, we’ll uninstall TeamViewer Host.
Step 1: Launch Revo Uninstaller
Once installed, open Revo Uninstaller. You’ll see a dashboard showing all installed Windows programs.
Use the search bar or scroll through the list to locate the app you want to remove.
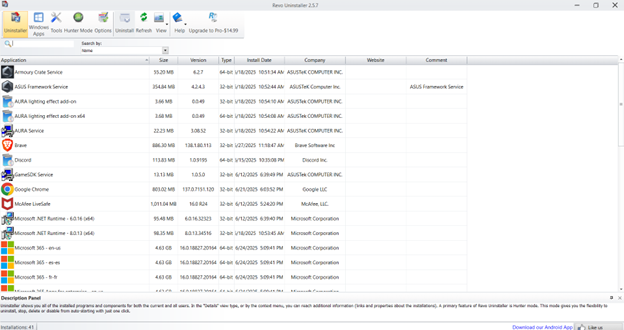
In this case, find TeamViewer Host, click it once to select.
If you’re unsure whether you’re selecting the right app (especially with similarly named software), Revo lets you right-click and view additional details like install location and version number.
Step 2: Decide on System Restore Option
When you select the app, you’ll be prompted to create a System Restore Point.
Why enable it?
- You can roll back changes if something goes wrong during the uninstall.
Why skip it?
- The uninstall process will be faster and use less disk space.
For this guide, I’ll skip the restore point for simplicity.
Click Continue to proceed.
Step 3: Trick Alert – Hit “Cancel,” Not “Uninstall”
After clicking Continue, Revo will show you a prompt asking if you want to uninstall the app.
Here’s the trick: Click “Cancel” instead of “Uninstall.”
Why? Because if you click “Uninstall,” Windows will only remove the core files — not the leftovers.
Clicking “Cancel” tells Revo to skip the default uninstaller and go straight to scanning for remnants.
This might seem counterintuitive, but it’s one of the most important steps to ensure a truly clean uninstall.
Step 4: Choose Scan Mode
Some users have reported issues like the ‘Wireless Module Not Supported’ message after uninstalling certain drivers or software. If you run into similar networking glitches, check out this detailed troubleshooting guide for wireless module issues to help you get back online.
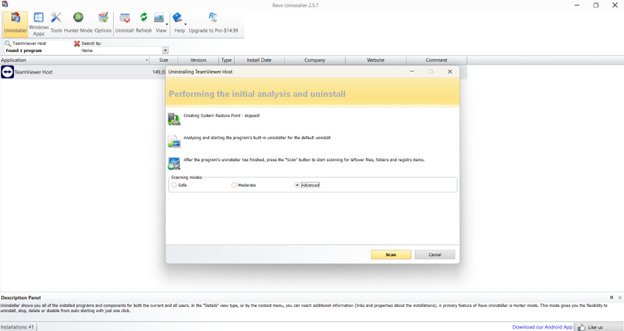
You’ll now see three scan options:
- Safe Mode – Fastest, minimal leftover detection
- Moderate Mode – Balanced scan of common leftover files
- Advanced Mode – Deep scan of your system and registry (recommended)
For a complete removal, select Advanced Mode and hit Scan.
If you’ve ever reinstalled an app only to find it still behaves strangely, this is often due to missing components like .NET Framework. Here’s how to install the .NET Framework in Windows 11 if you need it.
While this scan may take a minute or two longer, it’s worth it if you’re removing apps that have deeply integrated system files or have been installed for a long time.
3. Removing Registry Items & Leftover Files
After the scan completes, Revo will show any remaining registry entries related to the app.
- Click Select All
- Click Delete
- Confirm when prompted
Then it will scan for leftover files and folders. Again:
- Click Select All
- Click Delete
- Confirm deletion
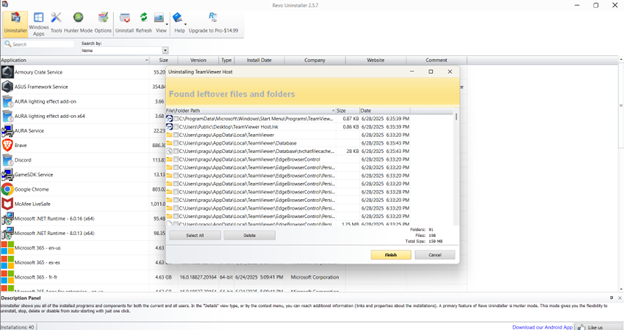
If some files can only be removed after a restart, Revo will let you know.
Click Finish when done.
You’ve now not only uninstalled the app but removed all traces that it ever existed on your system.
4. Restart Your PC
To complete the removal, restart your computer. Any lingering locked files will be removed during boot. If you’re also trying to uninstall default apps or bloatware, here’s how to remove built-in apps from Windows 10 safely.
Click the Start menu → Restart.
This step ensures that all temporary data, locked registry entries, or running background services tied to the uninstalled program are cleared out.
5. Final Thoughts
If you’re installing and uninstalling software frequently, Revo Uninstaller is a must-have tool. It ensures you don’t leave digital clutter behind and keeps your system running smoothly.
Whether you’re removing a heavy-duty app like TeamViewer or a lightweight utility, the process is the same — and once you do it a couple of times, it becomes second nature.
Bonus tip: Revo also includes other handy tools like a junk cleaner, autorun manager, browser cleaner, and evidence remover — useful if you’re trying to give your PC a full refresh without a factory reset.
If you’re ever dealing with connection errors while reinstalling or browsing after a cleanup, here’s how to fix ERR_CONNECTION_REFUSED in your browser.

How To Ctrl Alt Del on Remote desktop Session
How To Create Shortcut To URL on Desktop for Windows 10/11/7
Upgrade From Windows 10 To Windows 11 Without Losing Data
Windows Snipping Tool Shortcut Creation And Guide
How to Find IP Address of Printer On Windows