Windows 10 still offers powerful ways to split your screen so you can multitask efficiently — whether you’re using a laptop, dual monitors, or a massive ultrawide display. While Windows 11 introduced Snap Layouts, Windows 10 users still have the built-in Snap Assist (side-by-side or 4-way grid) and can unlock advanced layouts with Microsoft’s free PowerToys FancyZones tool.
In this guide, I’ll show you exactly how to split screen on Windows 10 — from quick Snap Assist keyboard shortcuts to creating custom zones with PowerToys. I’ll also cover how I split my ultra wide monitor into multiple sections and how you can do the same with a single display or across multiple monitors.
If you’ve already seen my previous guide on how to use dual monitors in Windows 10, this one takes it further — with step-by-step instructions for setting up PowerToys FancyZones and tips to customize your workspace exactly the way you like it.
If you are looking for a much more customizable and setup with multiple windows/sections follow through.
How to Split Your Monitor Into Two Screens on Windows 10
If you have two monitors connected to your computer, you can split your screen into these two monitors and use both as standalone screens.
You have to make sure that two monitors can function as separate monitors, in some cases you might only be mirroring the screen into both. To extend (not mirror) your desktop across monitors in Windows 10:
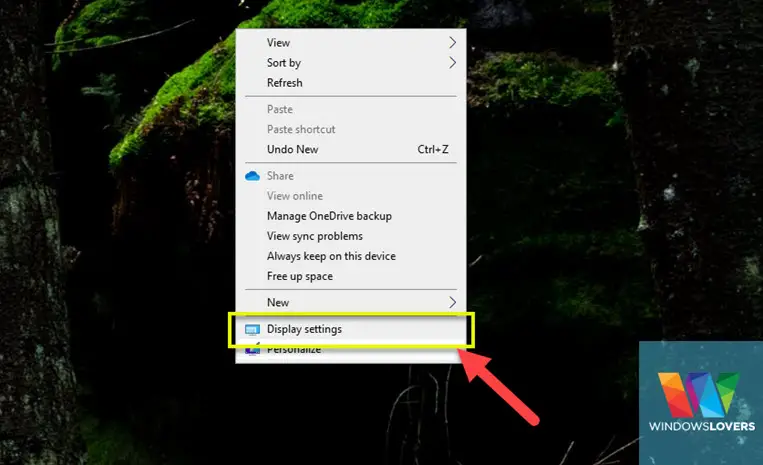
- Right‑click the desktop and click Display settings.
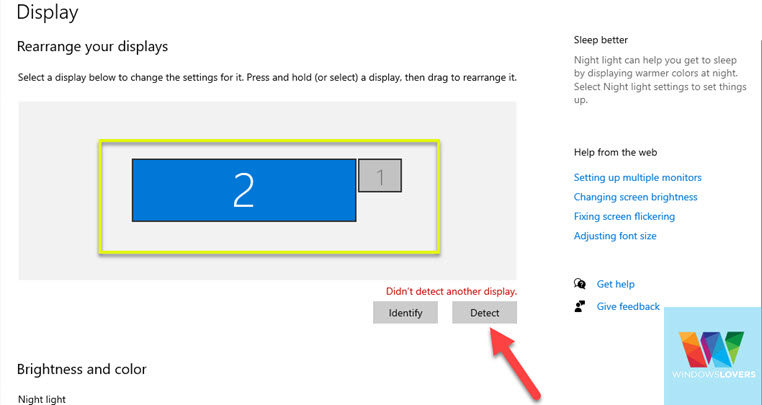
2. Under Rearrange your displays, click Detect if the second monitor isn’t shown. In some cases, you might need to update drivers or change cables if Windows 10 is not detecting your second screen.
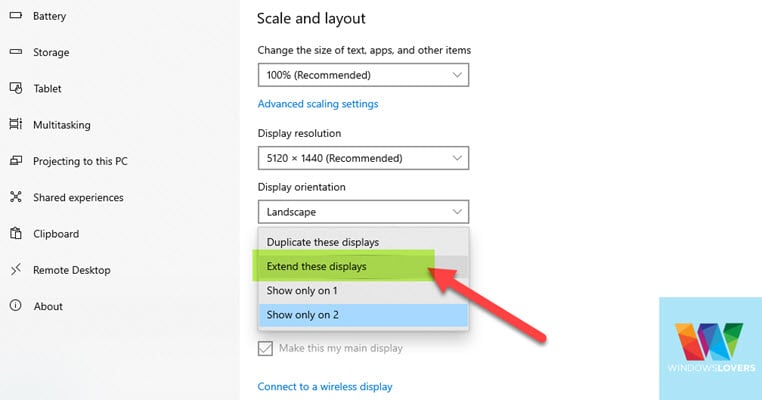
3. Scroll to Multiple displays and choose Extend these displays. Click Keep changes.
4. Drag the monitor icons (1 and 2) to match their physical position on your desk. This matters for how your mouse moves between screens.
A really important thing is that, once the screen is split, the mouse cursor will behave relative to the way the screens are placed under “Display” like in the first image.
For my setup “2” is my main monitor and “1” is the second monitor. For that reason, the mouse and windows can move between two screens based on the way they are placed in the window.
You can split your screen into 3 screens, 4 screens as many screens you prefer with this process.
If you are working from home and would like to manage multiple monitors while remotely connecting to your work’s PC, this can come in very handy.
If you are not quite clear on how to set this up, leave a comment I’ll get back to you.
How to Split Screen on Windows 10 with a Single Monitor
Moving on to how to split screen in Windows 10 if you have one single large monitor.
I have mentioned my setup and application that I use to split my monitor into multiple sections quickly.
- Aorus 15P XD Intel Tiger Lake laptop with Nvidia RTX 3070P
- Samsung 49″ Curved monitor
- Free App(PowerToys) to split screen in windows 10
Quick: Split screen with keyboard (no apps)
- Win + Left/Right to snap the active window to a side.
- After snapping, press Win + Up/Down to quarter it into a corner.
- Win + Up/Down cycles maximize/restore/minimize.
This is built‑in Snap Assist and is perfect for 2 or 4 equal regions.
Using PowerToys for Advanced Screen Layouts
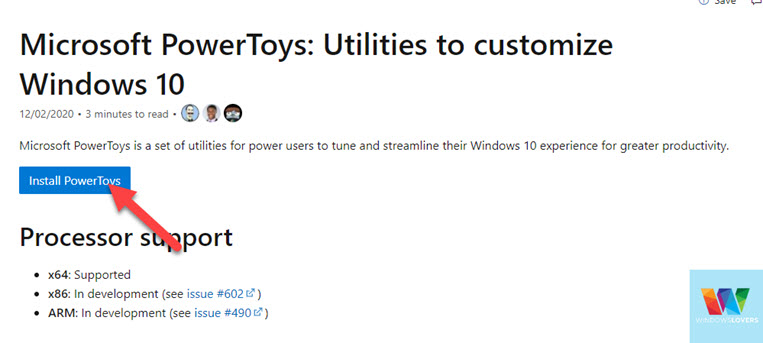
PowerToys is a Windows 10 management/customization available for free from Microsoft. This free application does more than splitting the screen but for the purpose of this video, I’ll be covering its’s “FancyZones” feature. PowerToys Fancyzones makes it seamless to split your screen into as many sections as you would like and use a keyboard shortcut to snap windows to those sections and resize automatically.
Fancy Zones allows a user to quickly create complex windows layout and basically slice your screen into as many sections you prefer. It also makes snapping windows to these sections seamless and very easy.
Install & auto‑start PowerToys:
- Download and install Microsoft PowerToys for Windows 10.
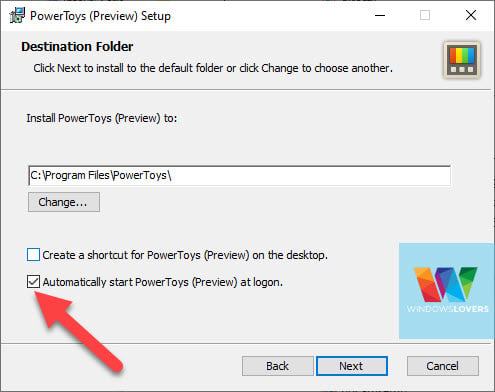
2. While installing, the only option you need to double-check is that the “Automatically start PowerToys(Preview) at login is checked. You can always manually start the app after logging into Windows but, this is one less step you need to do every time you need to log in to Windows.
Run as admin (recommended):
- In PowerToys → General, turn on Always run as administrator, then click Restart as administrator.
Read next on my blog: How To Connect Two Monitors To Your Laptop
Using PowerToys To Split Your Single Ultrawide Monitor
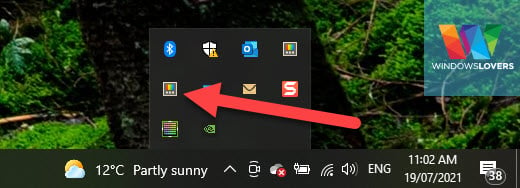
Open the start and search for “PowerToys” and open it. If nothing happens look if it’s already running in the background. To check this click on the tray icon on the bottom left corner.
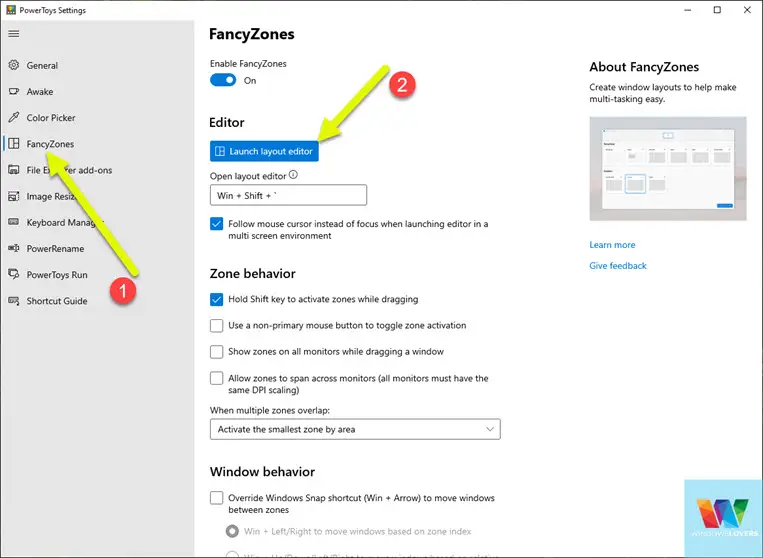
- Right-click on the PowerToys icon and open “Settings”.
- Open the “FancyZones” from the option on the left-hand side of the window. Click on the “launch layout editor”, leave all the options as they are. You can play around and customize the fancyzones default layout and settings to your liking later on.
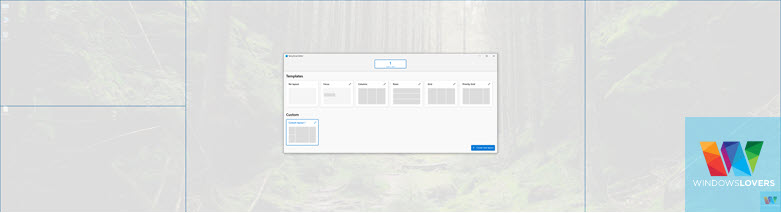
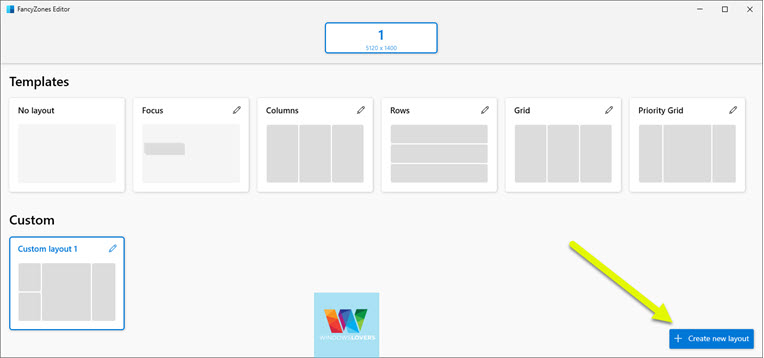
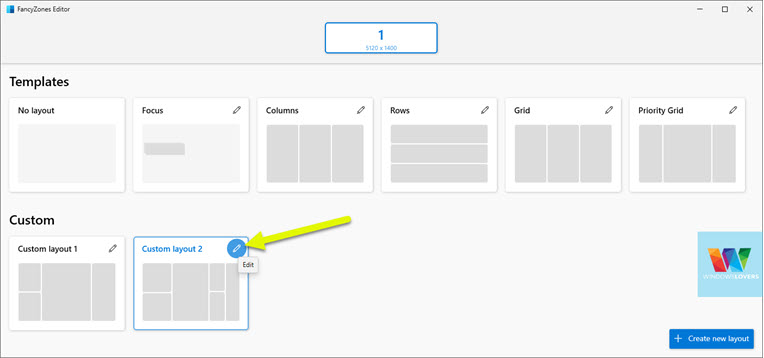
You can either choose from the presets or if you would like to create custom sections, you can click on “Create new layout”.
My split-screen setup
I have a large window in the center, one full-height window on the right-hand side, and two small split screens on the left-hand side of the screen.
If you would like to copy mines, look at the section below.
How To Create A Custom Zones To Split Windows
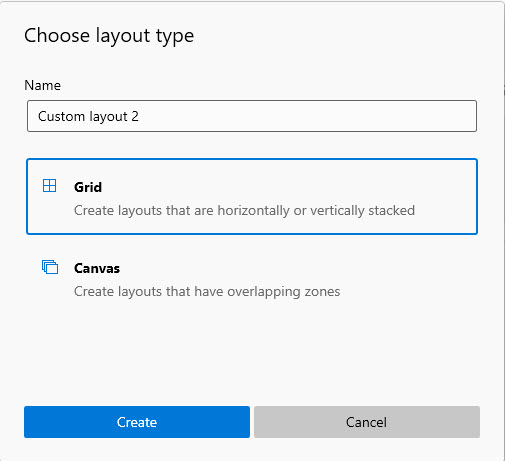
- Click on “Create new layout” and select “Grid” and give it any name your prefer > “Create”.
- In the layout editor:
– Hove your mouse and click to split the screen on that part
– If you would like to horizontally split a screen, hold the shift key while creating the zone
– Move the blue slider to resize those zones - Once you are happy, click on “Save & Apply”.
To snap a window to any of these sections, drag the window while holding Shift over a zone; it snaps and resizes automatically. You can also enable Hold Shift key to activate zones while dragging inside FancyZones settings if it isn’t on.
Watch the gif video for reference.
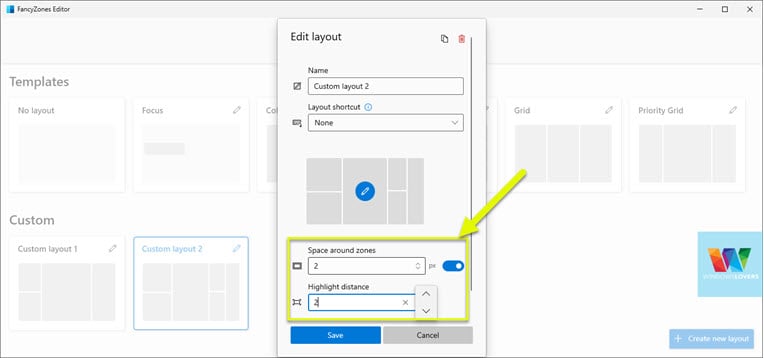
Make layouts cleaner
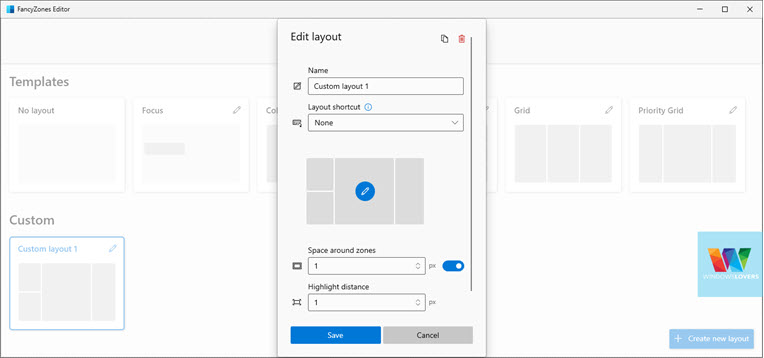
- In FancyZones → Layout editor (pencil icon), reduce Space around zones and Highlight distance (I set both to ~2–4).
[Screenshot description: Layout editor options showing “Space around zones” slider.] - Create multiple layouts (e.g., Writing, Editing, Streaming) and switch them quickly with a custom layout switching hotkey in FancyZones.
How To Make The Setup A Bit Cleaner
By default, the spaces around are a bit too much and clearing makes the split screen setup much more clear.
Click on “Launch layout editor” and click on the pencil on the top right corner of the layout.
A couple of things I change is “Space around zones” and “Highlight distance” to 2 and hit “Save”.
You can also set shortcut keys to quickly switch around if you have multiple layouts.
If this is too much work and you have a small screen and would like to use default tools in Windows 10 to split screen, let’s see how it’s done.
How to Split Screen on Windows 10 Using Built-In Snap Assist
Even though the default feature on Windows 10 is not packed with a lot of features but if you are only using a regular screen, this should be more than enough.
Windows 10 snap-in feature quickly allows you to split your screen on a laptop or monitor by dragging windows around.
View Two Windows Side By Side
To open a window side by side on Windows 10, hold a window and drag it all the way to the right or left. This will snap this current window to that side and prompts you to all the currently open windows. Select another window that you would like to open side by side. Watch the below video for reference.
If Snap Assist suggestions don’t appear:
Go to Settings → System → Multitasking, turn Snap windows On, and enable “When I snap a window, show what I can snap next to it.”
Troubleshooting Split Screen and FancyZones Issues on Windows 10
- Snap not working at all? Check Settings → System → Multitasking → Snap windows is On.
- FancyZones doesn’t activate while dragging? In FancyZones, enable Hold Shift key to activate zones while dragging.
- Monitors mis‑aligned? In Display settings, drag the monitor boxes to match your physical layout.
- Apps won’t snap to zones? Some full‑screen or UWP apps resist snapping; try windowed mode.
- Gaming overlays conflict? Temporarily disable overlays (e.g., GPU utilities) or run PowerToys as admin.
FAQs
How do I split my Windows 10 screen into 3 columns?
Windows 10’s built‑in Snap Assist supports halves and quarters. For a 3‑column layout, use PowerToys FancyZones and create a custom 3‑pane grid.
What’s the keyboard shortcut for split screen on Windows 10?
Use Win + Left/Right to snap, then Win + Up/Down to quarter. Win + Shift + ` opens the FancyZones editor (if PowerToys is installed).
Can I use FancyZones on Windows 10 ultrawide monitors?
Yes — that’s where it shines. Create 3–5 columns with narrow gutters to mimic multi‑monitor productivity on a single ultrawide.
Is FancyZones safe and lightweight?
It’s an official Microsoft‑maintained utility. Resource usage is minimal on modern hardware.
Finally,
That’s how you can split screens in Windows 10 or Windows 11. PowerToys is for more advanced users and if unless you have a larger screen size you can just use Windows’s default snap-in feature.
If anything’s unclear for your setup, drop a comment and I’ll help you dial it in.

Permanently Turn OFF Efficiency Mode in Windows 11 & 10
Control Windows 10 With Voice – Cortana
Use iPad As Second Monitor in Windows 10/11 Wirelessly For Free
Best Free Screen Recorder Software For Windows 10,8.1,7
Password Protect A Folder Without Using Any Application